阅读视图

Light Up Your Heart

A great Valentine project to brighten the day for your special someone.

Materials Needed

Step 1 Cut Out Cardboard Shape

Cut a heart shape out of cardboard. You can do any shape you want, though.

Cardboard heart

Step 2 Apply Copper tape

Make a “track” of copper tape around one side of the heart. The rails of the track should not touch. One is for the negative, the other for the positive part of the circuit. Leave a piece unstuck. This will be used for the “button”.

Cardboard heart

Step 3 Poke holes for LEDs

Poke holes in the heart for the LEDs. You can do as many or as few as you want. This one is labeled with - and + to make sure the LEDs are placed correctly.

Cardboard heart

Step 4 Insert LEDs

Push the LED legs through the holes. The short leg is negative ( - ) and the long leg is positive ( + ).

Cardboard heart Cardboard heart

Step 5 Secure LEDs to Copper Tape

Bend the legs of the LEDs so that the negative leg lays flat on the negative rail and the positive leg lays flat on the positive rail. Tape them down so the stay in contact with the rails.

Cardboard heart

Step 6 Make Battery Holder and “Button”

Use cardboard or cardstock to make a ring the size of the battery. The ring should be at least three times as tall as the battery.

Cardboard heart

Fold a piece of cardboard or cardstock to fit like a bridge over the battery ring. The positive ( + ) side of the copper tape will attach to the underside of the bridge to act as a button.

Cardboard heart

Step 7 Secure Battery and Button to Heart

Use Masking tape to secure the battery ring and bridge (button) to the back of the heart. The button should rest on the negative ( - ) rail of copper tape. The positive ( + ) rail of tape should be attached to the bottom of the bridge.

Cardboard heart

Test the LEDs by pressing the button. They should all light up. If not, check to make sure all of the LED legs are touching the correct rail and are firmly taped down.

Step 8 Wind with Yarn

Finally, wide yarn around the heart until all of the cardboard is hidden. Secure the yarn on the back by tying a knot.

Cardboard heart

Press the button on the back to make the LEDs light up!

Cardboard heart

  •  

3D Printed Cityscape

A screenshot of a map

This is a guest post by Makerspace user, Yifan Liu. During the 2025 Fall semester he developed and created a number of amazing cityscapes.

3D Print Tutorial: Cityscapes

By: Yifan Liu (yl3gm), UVA Graduate Medical Student

Creating a 3d Model

  1. Open the online software Map2Model. You will be presented with the following interface. A screenshot of a map
  2. Enter which city or area you would like to model search bar. Then select an area of the map to be modeled.
    A screenshot of a map
  3. Adjusting settings: There are many customizable settings that can be adjusted in the right-hand menus. Below are a few example settings that I commonly choose.
    • Base:
      • Map size: 152mm
      • Base layer: 4mm
      • Topography: Disable if modeling a relatively flat area to reduce complexity
      • Frame: Off
    • Features:
      • Roads
    • Include footpaths: Enable if you want to include detail of hiking trails or parks for example. Disable if you want to reduce file size and processing time
    • Road Types: Play around with disabling different road types for effect or reducing complexity - Grass: Off - Buildings:
    • Buildings Scale: 1.2x – 1.5x - Sand: Off - Piers: Off
  4. Press “Generate Mesh” to generate a 3d model of your selection A screenshot of a map
  5. Click the dropdown menu next to “Export 3MF”. Click “Export STL”
    • Note: you can also export as 3MF to retain features like roads, water, and buildings as separate objects.

Editing and Refining (optional)

You may notice that some structures in the model are not correctly detailed or rendered. If you want to add more detail, import your model into a 3d modelling software. For this example, I used Blender. More detailed instructions on how to use Blender can be found online.

  1. Download or create 3d models of desired buildings. Adjust to correct scale and position and place over existing building on model.
    A screenshot of a map
  2. Delete undesired geometry or vertices on cityscape.
  3. Export file as an STL for slicing and printing.

Slicing

  1. Open STL file in PrusaSlicer
  2. Adjust settings by going to “Print Settings”:
    • Print settings: 0.20mm Structural
    • Brim: 4mm
    • Infill: 10%
  3. Multimaterial Printing: (optional)
    • Click on the STL object and click on Multimaterial printing on the left-hand menu icons
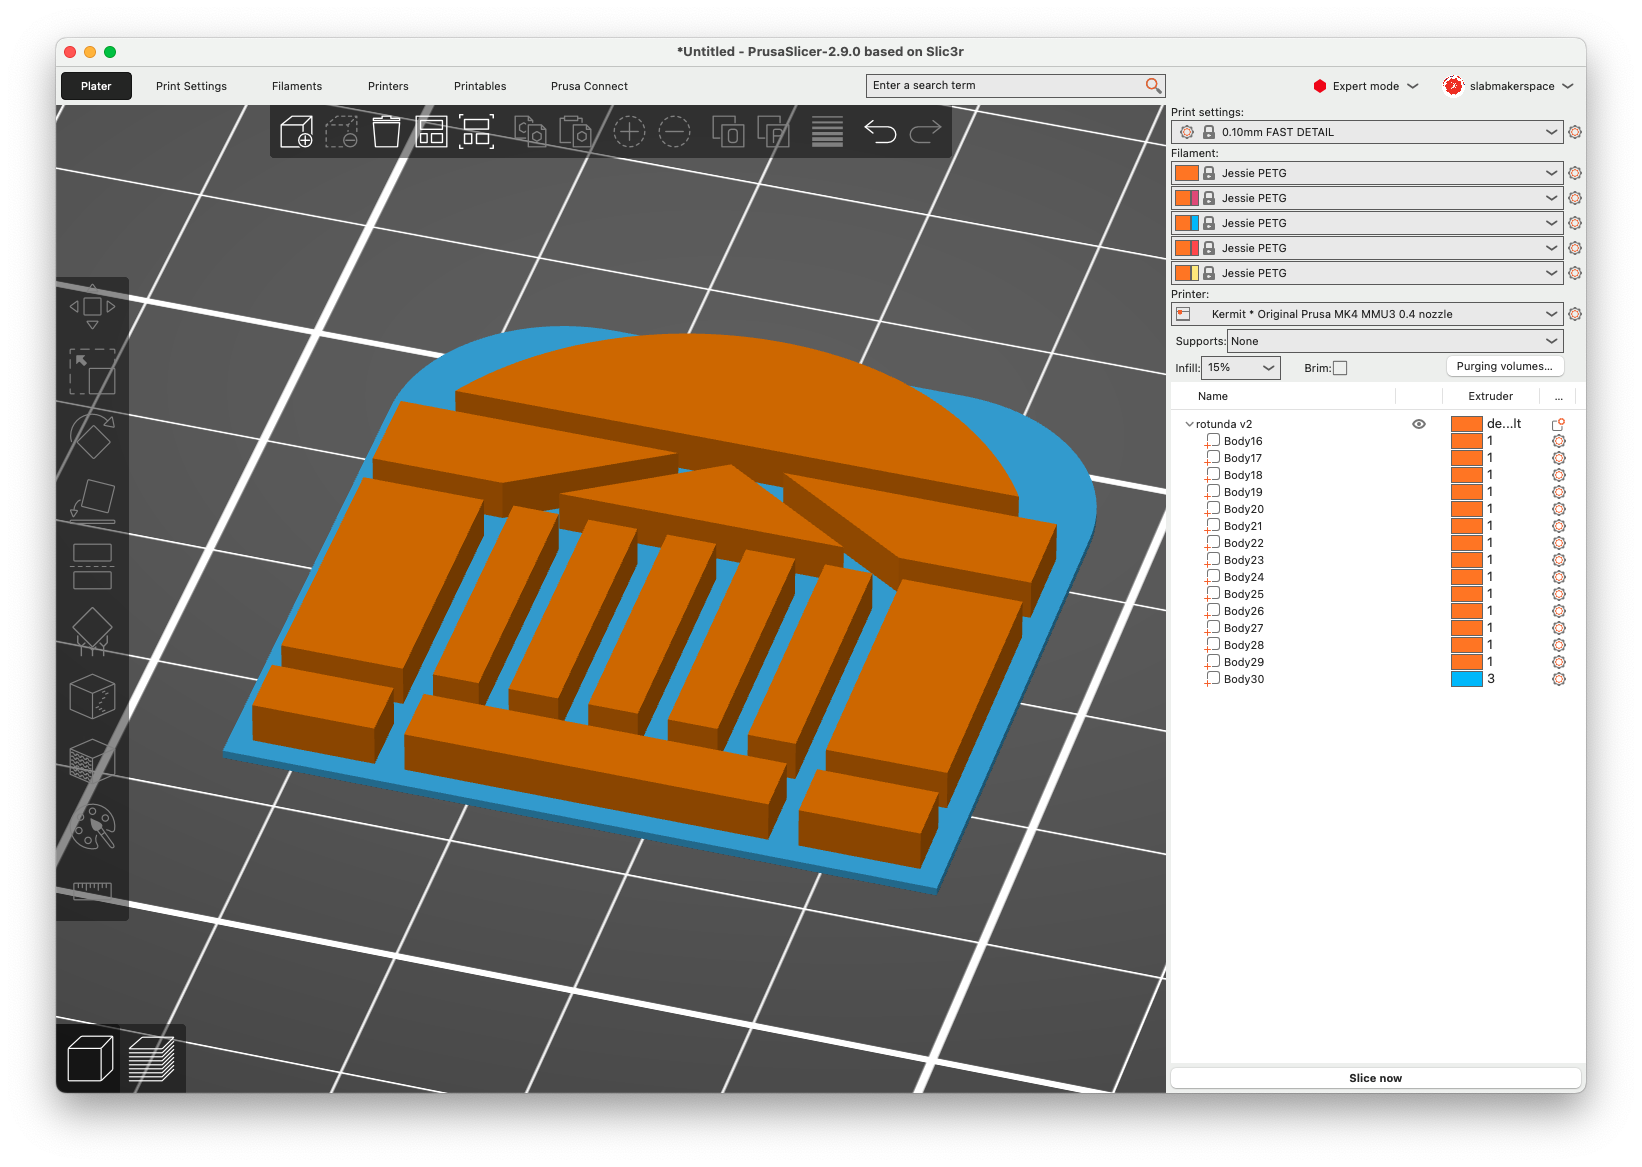
    • Use the Smart fill tool to paint the desired colors. I prefer to paint water features blue and all other features white.

A screenshot of a map

Printing

  1. After slicing export your file to the desired printer. If using Multimaterial printing, use either Kermit (Prusa MK4 MMU3) or Big Bird (Prusa XL).
  2. Load and select desired filaments on printer. Make sure to check that the correct filament is paired with the correct extruder.
  3. Print and wait!

A screenshot of a map

  •  

Design Jams, Part 2: The Shorter Version

Last time we met, I promised to tell you all about the second kind of design jam, so here we go!

Design Jams, Part 2

or

So I’ve Got This All This Great Data and Scholarly Writing About My Specialty, And I Want To Do New Things With It, But I’m Not Sure What That Might Be Or What’s Possible

or

The Focused One

If you’ve got a project that you’ve been working on for a while, and a set of data that’s answered the questions you initially set out to answer, but you’d like to bounce some ideas around about how you might explore answering new questions or presenting the results of your scholarship in new and exciting ways, have we got the design jam for you!

This kind of design jam is really about looking at your data in new ways, exploring new questions to ask of it, and designing refreshed visualization and presentation of your scholarship, so it’s a much more focused consultation.

So what do we need from someone who wants to do this kind of design jam with us and how should you prepare? What a great question, I’m so glad you asked. What do you want to communicate about your work? And who’s your audience? Have you seen other websites or data visualizations that you liked, and if so, what was it that sparked your interest?

Once again, you need to give some thoughts to the existing constraints on this research. What’s your timeframe for completing this work? Is there additional data that you need to collect and analyze? What sort of budget are you looking at for producing the end results? Any other constraints? If you’re coming to us, there’s assuredly a digital component, and we can help you better understand the technology, the costs, and how long the work is likely to take.

We’ll schedule a meeting for you with a Scholars’ Lab expert or two who have the expertise you need given the type of data you’re working with, maybe the librarian who specializes in your discipline, and potentially, experts from another of the Library’s technology units with skills we don’t have in the Lab.

The overall goal of a focused design jam is to come out of it with a project plan for visualizing, or re-visualizing scholarly work. Sometimes that’s a plan for the scholar/researcher to do the work themselves, sometimes the end product is a list of requirements that will feed into a grant application, including both technical specs and budgeting needs, and then sometimes what’s revealed in the consultation is fresh data gathering so that new questions can be asked of the data. Like everything we do in the Lab, this variety of design jam is meant to be an iterative process: consultation to work iteration to results review to refined work iteration.

So what would an agenda for this kind of design jam look like? You’re full of great questions! Here’s a sample agenda:

  • Gathering
  • Introductions all around
  • Scholar introduces their work, shows current digital outputs and visualizations, if any
  • Chat about adjacent projects and projects that you admire

The goal for a meeting of this type is a full understanding of the new questions you want to ask of your data, and your new ideas about how to present the results of those questions to your chosen audience(s), so that we can assist you in generating an initial workplan, and potentially provide you with the information you need to create a grant application to provide the funding to collect any new data required and to create the new digital products.

Sound interesting? Have some cool scholarship that you’d like to look at with fresh eyes, or communicate about in new ways or for new audiences? Please contact us! We’d love to chat with you about your ideas!

  •  

Design Jams, Part 1

At a consultation in the Lab a couple of weeks ago, the group we were chatting with had never heard the term “design jam” before, so I thought I’d get some ideas into a couple of blog posts, in case there are others who’ve never encountered this way of working before.

So what the heck is a design jam?

Design Jams, Part 1

or

So I’ve Got This Great Idea, But I Don’t Really Know Exactly What I Can Do With It or How To Get Started, and Other Sundry Considerations

or

The Big One

Design jams are group brainstorming and idea generation sessions that are intended to solve design problems by generating a wide set of possible interventions. So, think of it like getting about 1000 feet up above the research you want to do with a bunch of smart, experienced people, and just riffing on ideas for a while. By going broad before you try to go deep, you can help to insure that you’re asking the actual question you want to ask (aka, the one that actually interests you and pushes your research in the direction you most want it to go), that you’ve got the right data collection approach to get what you need in order to generate the answers you’re seeking, and that you can creatively approach presenting those answers to your intended audiences in ways that help them deepen their understanding of your research.

Hang on! Don’t run! Design jams are fun! I promise. Really.

So how do we do this kind of design jam in the Scholars’ Lab? I’m so glad you asked!

You take one or more scholars and/or researchers who have a project idea, add in several Scholars’ Lab staff members with varying education, training, and practical experience, sprinkle over subject specialist librarians from the appropriate disciplines, technical specialists from other units in the Library whose perspectives and input will be needed and valuable to the scholar/researcher, a large whiteboard with a variety of markers, and about 1-2 hours time.

Note: You remember the meeting facilitation for beginners post that Brandon and I posted a couple of years ago? Yeah, for a design jam, throw most of that out. The last thing you want for a “big” design jam is a really rigid agenda. You do want an agenda, but not one that’s timeboxed in the same way a regular staff or project meeting is timeboxed. That’s also why a design jam is generally longer than a regular project meeting, too.

So what do we need from someone who wants to do this kind of design jam with us? You have to have a project idea that’s got enough breadth and depth for the meeting to be generative. So if you’re refining ideas that you’ve already spent a lot of time researching and writing about, or if you want to use the results of an existing body of research to create a digital presentation of its data, it’s unlikely that this variety of design jam will be required. (More about this in the next post in this series. Coming soon to a Scholars’ Lab blog near you!)

But if you’re looking at new projects, projects that connect to your existing work in new ways or at new depth, it’s likely that a “big” design jam could be helpful in getting focused and aiming your work in the right direction.

How should you prepare? That’s another great question, I’m so glad you asked. You need to have done some basic research into the overall scholarly landscape in which your project will exist. Who else is out there doing work and asking questions that are similar? Whose project in their own discipline, or topics within your discipline, made you wonder how similar techniques would benefit your own research? What tools are being used to gather and process the data required, what technical skill sets are needed, and which of those do you already possess or want to acquire, or have available funds to pay someone to do?

Finally, you need to give some thoughts to the existing constraints on this research. What’s your timeframe for completing your project? What sort of budget are you looking at for doing the research and then producing the end results? (If you’re coming to us, there’s assuredly a digital component to the data gathering, and likely to those end results, and we can help you better understand how long processes are likely to take.)

Here’s the basic flow, which is the only agenda that we’re likely to use:

  • Gathering
  • Introductions all around
  • Project idea summary from the scholar
  • Questions from us about the landscape of scholarship, and tools and techniques, if known, any known constraints, and desired audience for the products of your research
  • Open ended questions from us about the scope of your work and the vision you have for any end products
  • Brainstorming and gathering ideas that the group comes up with about refinements to the research question, sources for data gathering, potential tools and techniques, analysis ideas, presentation opportunities

The overall goal of the jam is to come out of it with a project idea with which a first iteration could be built. What happens if you apply these data collection, data cleaning, and data analysis tools?1 What research questions can you actually answer with those results? Is that actually the question you wanted to ask and answer? What can you build from those answers to communicate your scholarship to your intended audience?

So the product of the jam is an initial project plan, which can be refined after an initial small iteration into the final project plan that will allow you to do the scholarship you most want to do. Once that short iteration is complete, we can help you refine the workflows, evaluate the tools you tried out, and then write a new project plan.

The goal overall for the second pass at data gathering and analysis is to set you up to actually do the project you want to do, and hopefully, get to a place where you have proof of concept that will feed into a grant proposal, should you find you wish to pursue this scholarship further.

Sound interesting? Did you just realize that you’ve got just this kind of idea kicking around, but didn’t know where to start planning? Please contact us! We’d love to chat with you about your ideas!

  1. Yes, humanities scholar, I hear you. What you work with is absolutely data, even if it doesn’t look anything like the data that the STEM side of the university works with. Pinky promise. 

  •  

Laser Cut & 3D Printed Keychain

This tutorial will guide you through the steps to make a keychain or charm that is both laser cut and 3D printed.

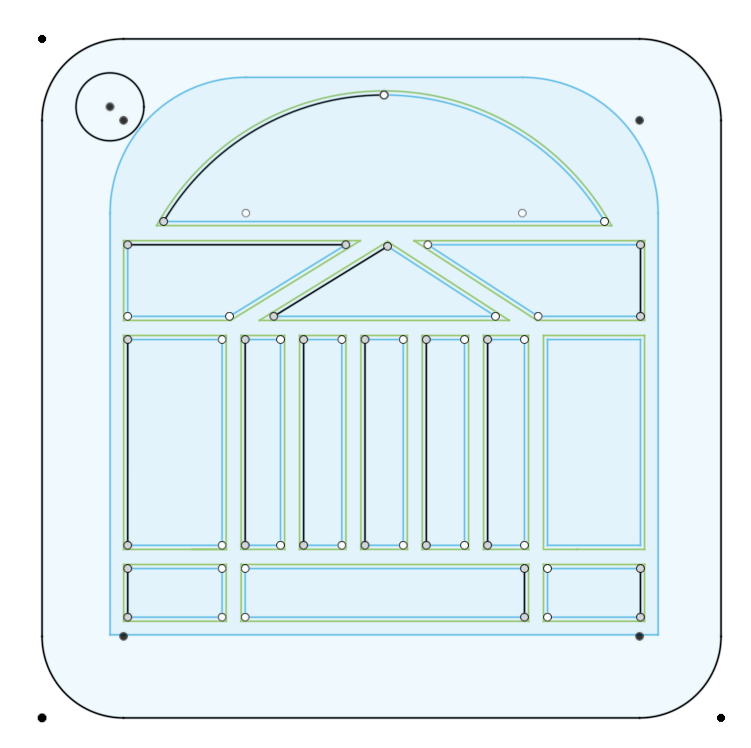
Design the keychain

This works best with designs that are mirror images across at least one axis. Names are possible, but much harder.

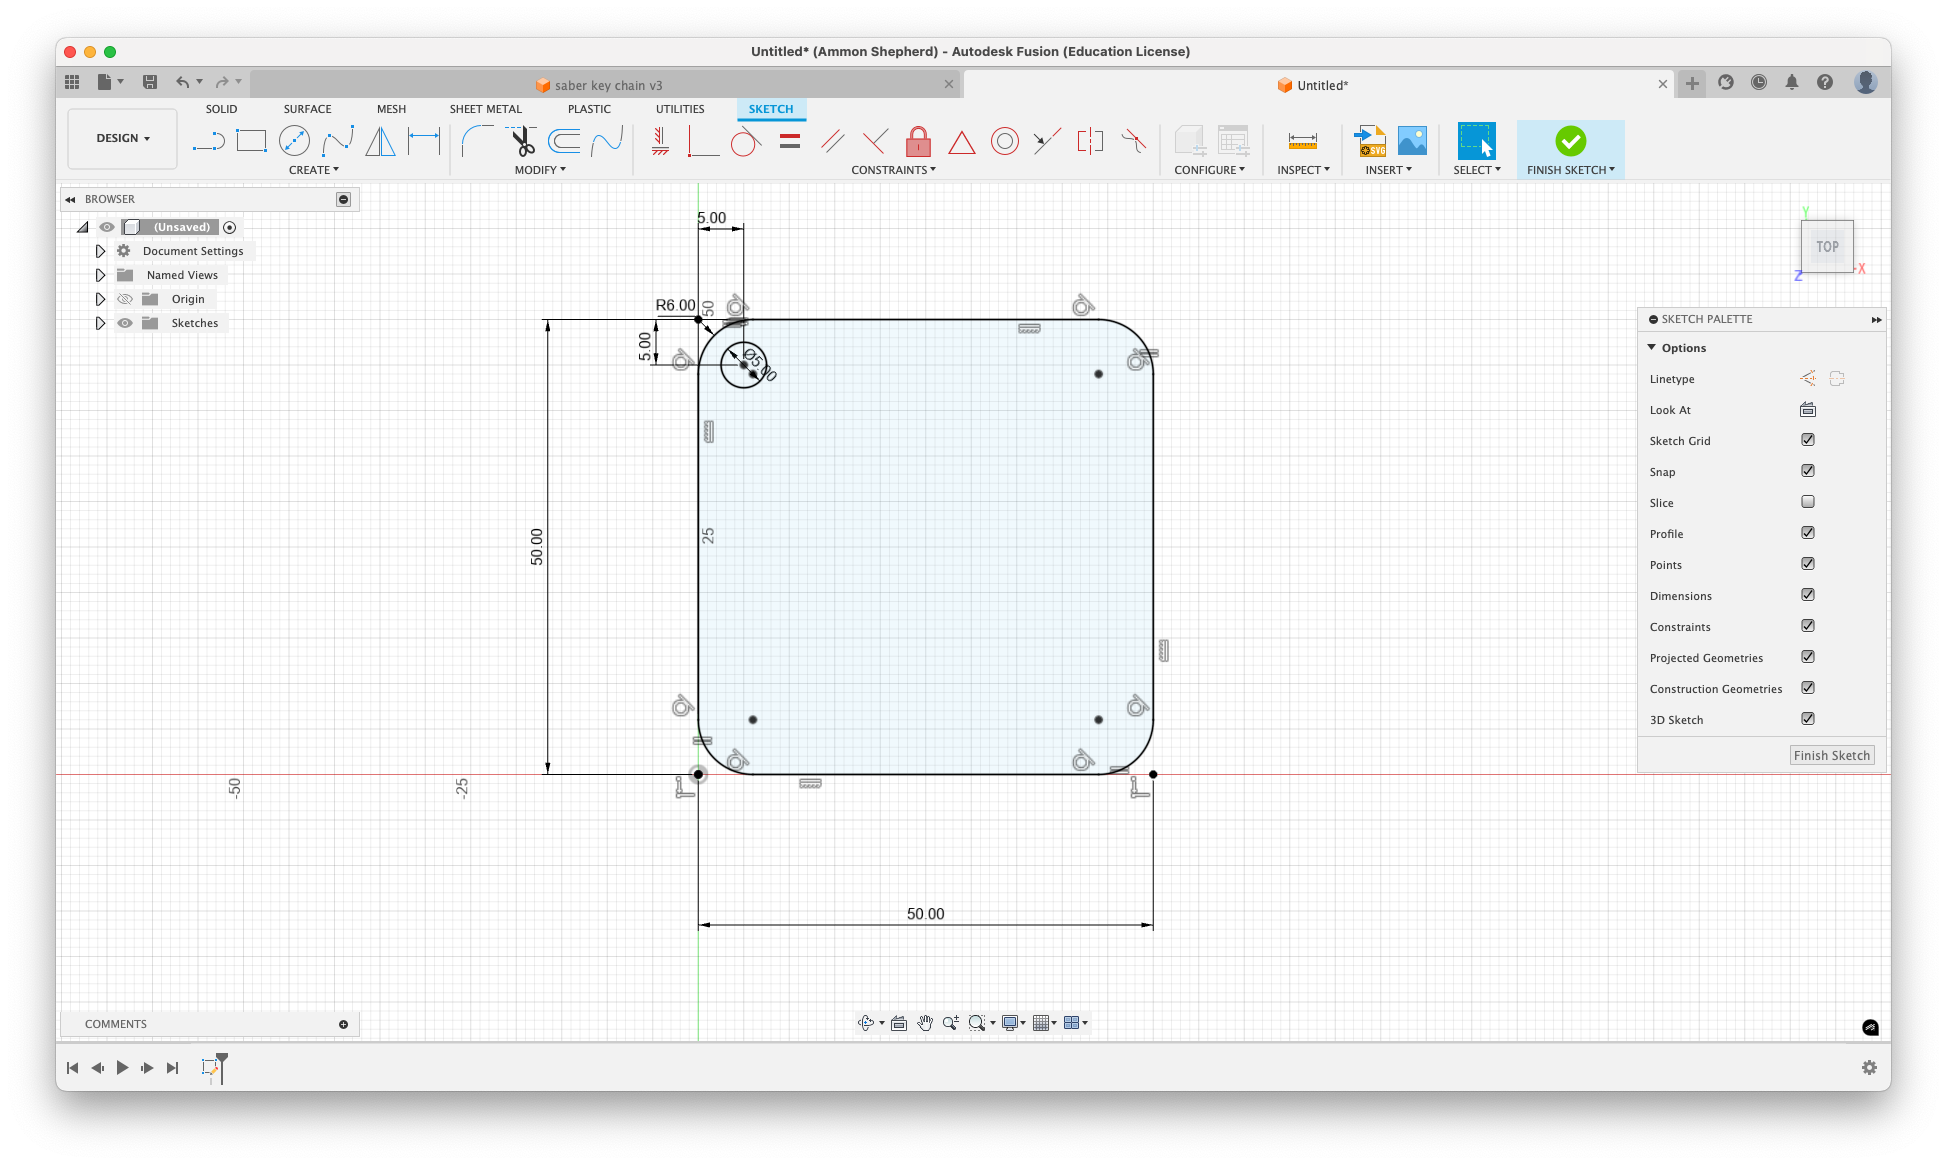
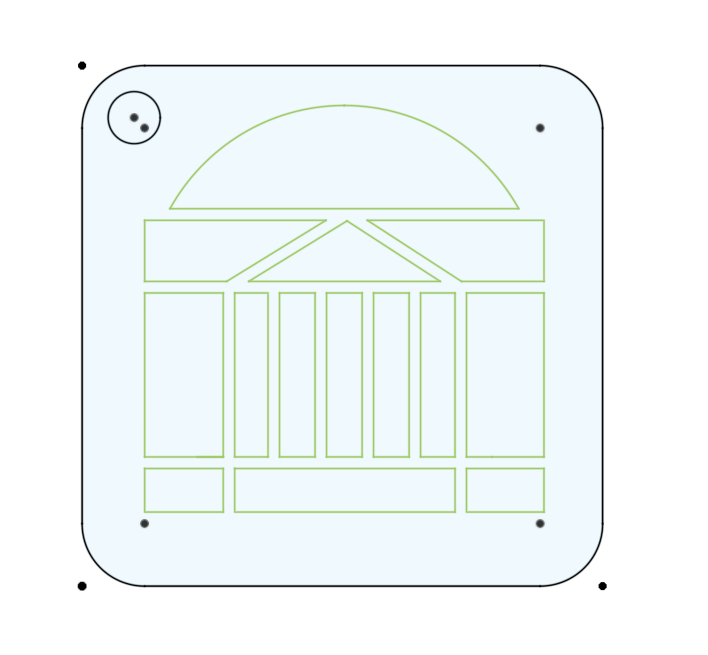
Sketch the outline of the keychain and the ring hole.

30mm x 70mm is a little bigger than a standard house key. If making a rectangle, round the edges at 6mm.

Add a circle for a hole 4-5mm in diameter, and 5mm from the center of the circle to the edge.

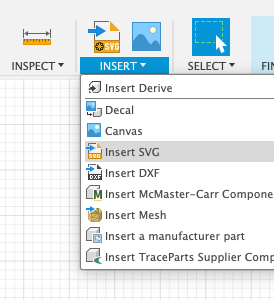
Import an SVG file for the design or sketch the design.

Line up and resize the SVG image to your liking.

Once you have the design set, add a rectangle around the design that will be cut out. This will serve as the bottom of the 3D printed part, and the section that will be engraved by the laser cutter.

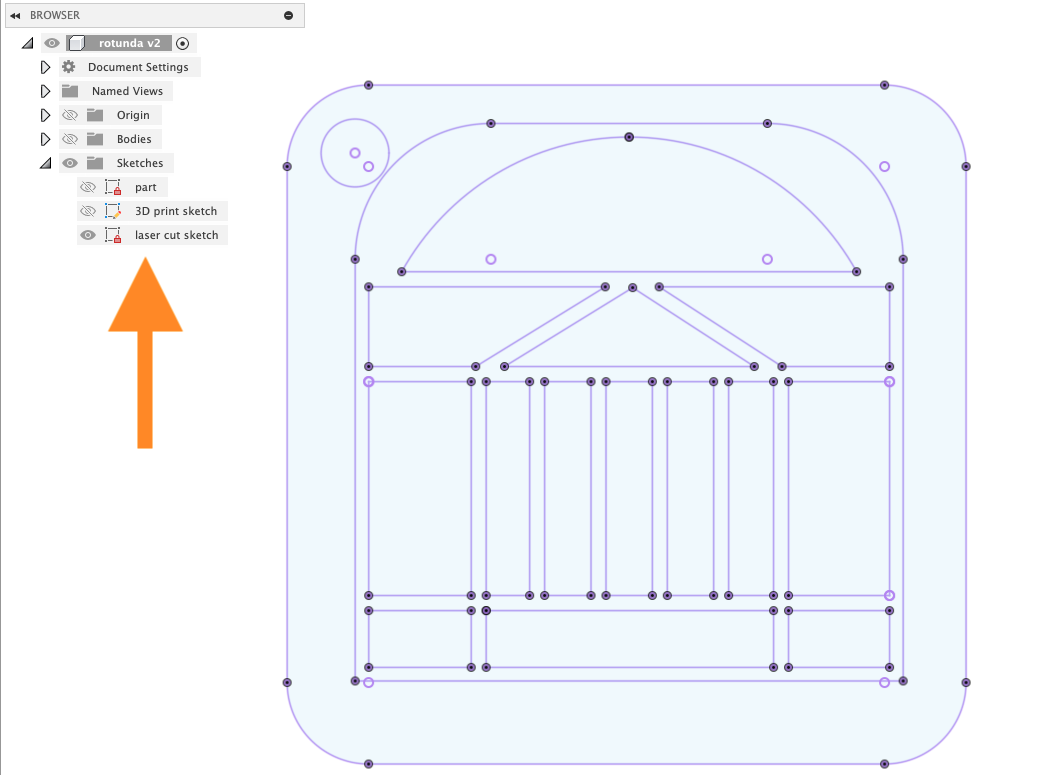
Just to make things clean, create a new sketch and project the current lines onto this sketch. These will be the engrave and cut lines used in Illustrator.

Save this laser cutting sketch of the keychain as a DXF file.

Making the 3D printed part

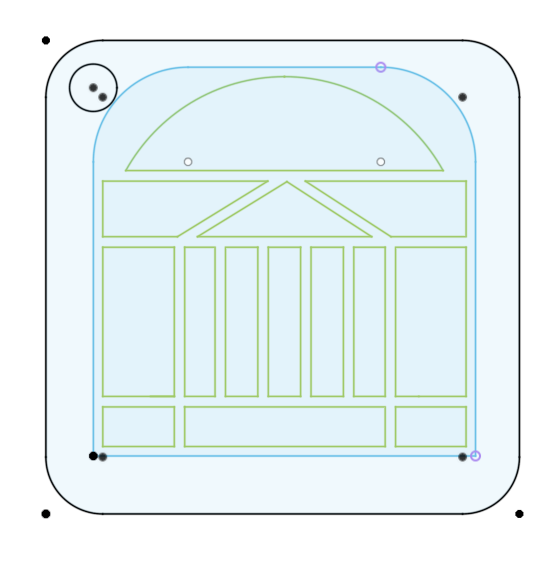
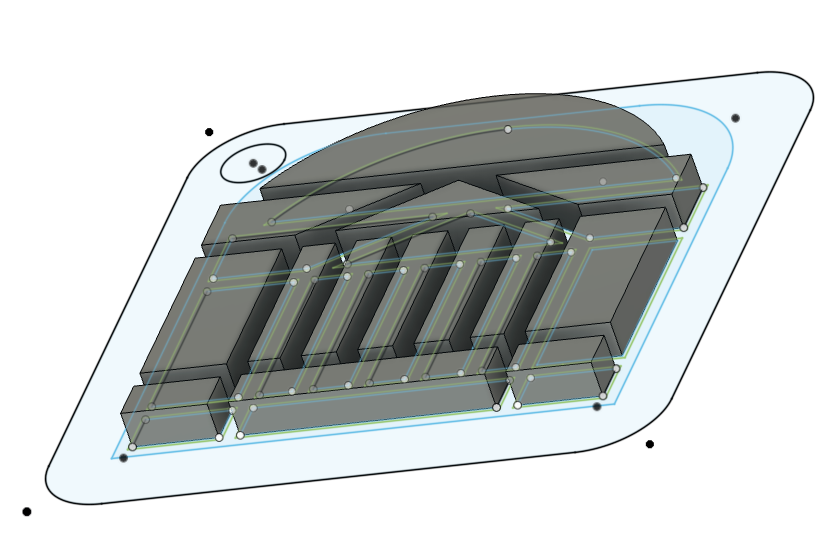
Next, create a new sketch for the 3D printed part.

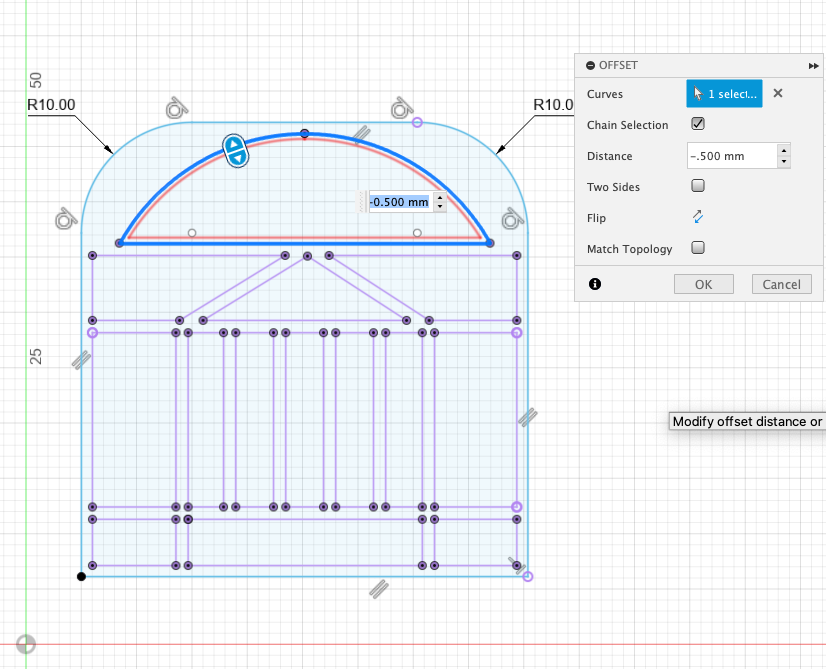
Project the lines of the design that will be 3D printed onto this sketch. Then select the lines and offset them inside by .5mm.

Extrude the inset design 3mm.

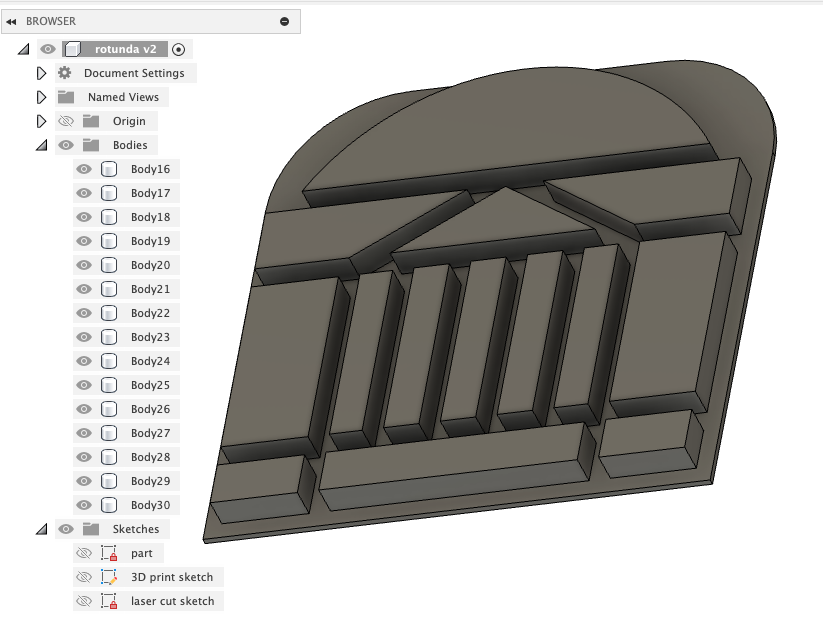
Then extrude from the shape surrounding the design as a new body by .5mm. Remember to extrude it as a new/separate body.

It’s important to have each part of the design a separate body from the bottom plate, so that it is easier to 3D print them in different colors.

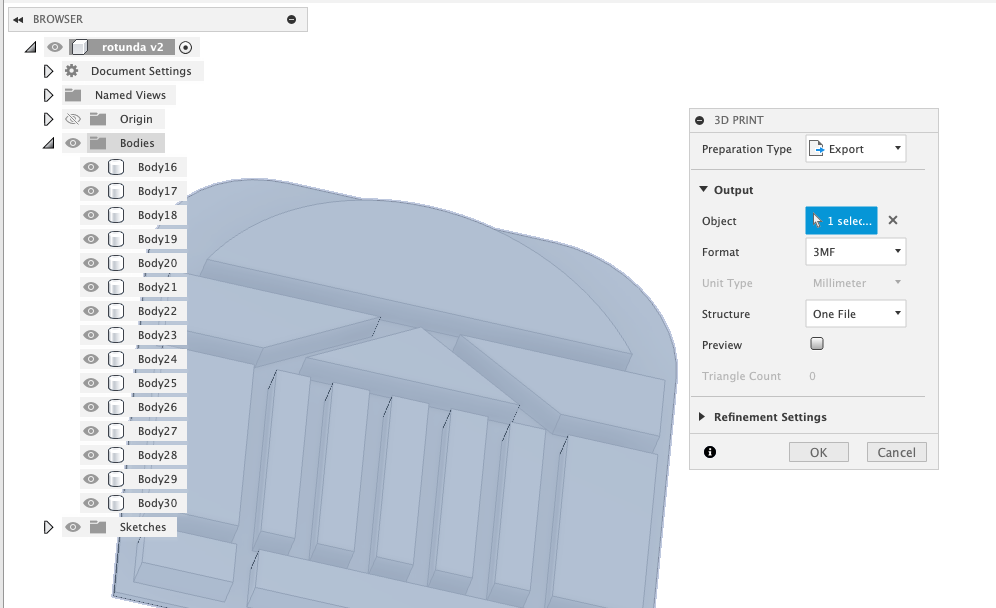
Export all of the bodies to be 3D printed. Go to File->3D print. Select the main Bodies folder, which will include all of the bodies in the export. Then click OK.

3D Printing

Slice the object for 3D printing

Select the colors you want for the print. There can be up to 5 different colors. Then select each part to have the correct color.

3D print the insert object on Big Bird, https://cal.lib.virginia.edu/seat/176961 or Kermit, https://cal.lib.virginia.edu/seat/176954.

Laser Cut

Prepare for Laser cutting in Illustrator

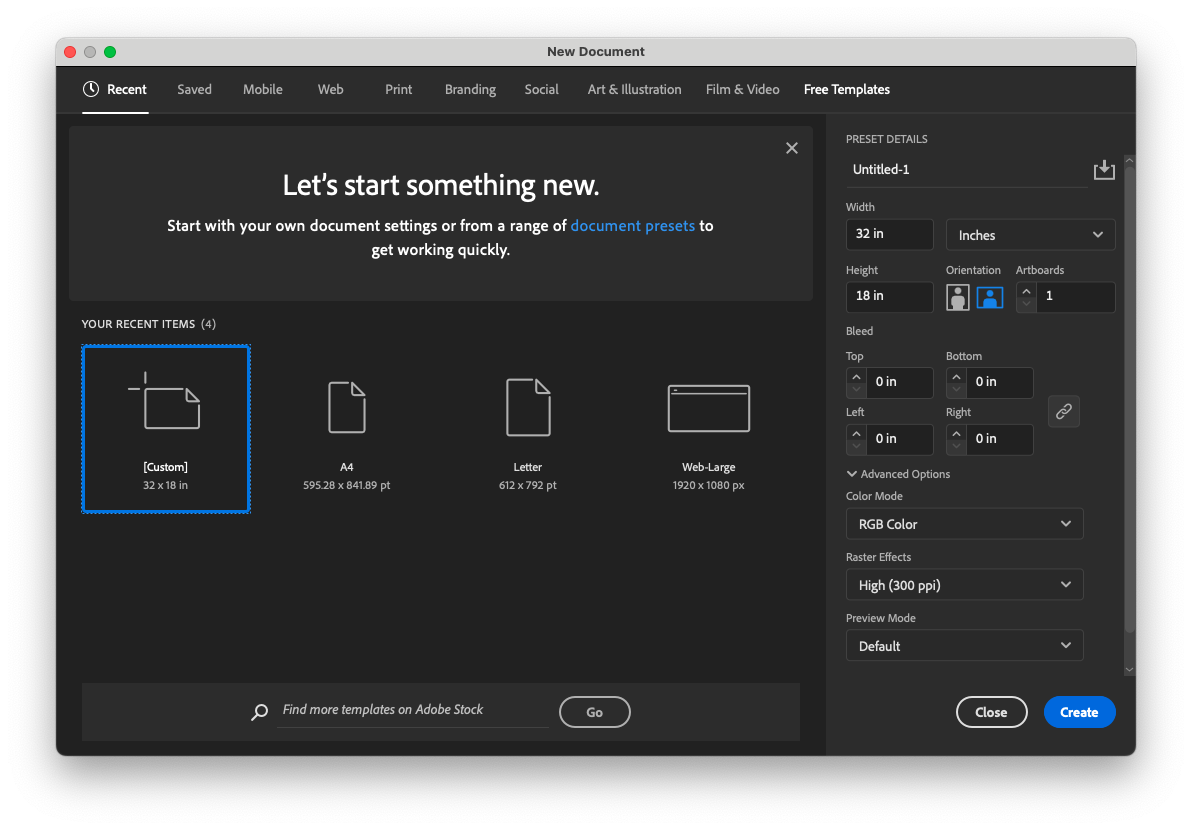
Open the DXF file in Adobe Illustrator in a new file that is sized to the laser cutter, 32”x18”.

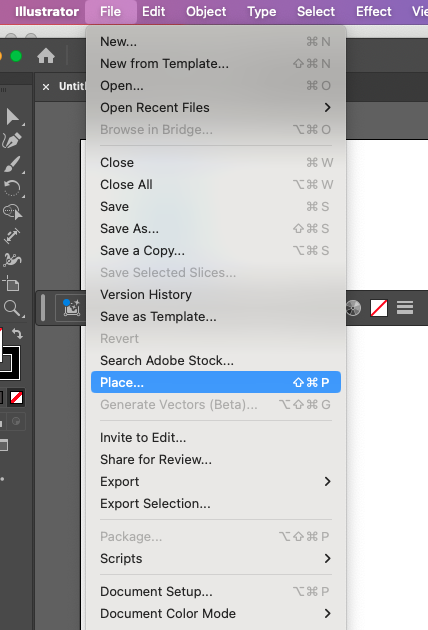
File→Place then select the DXF file.

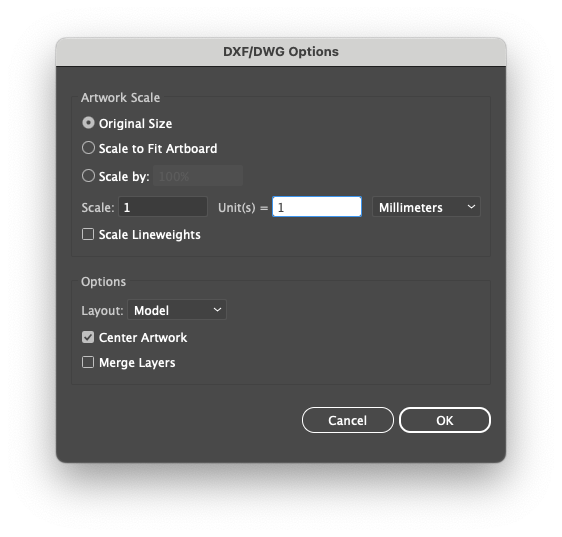
If you open the file directly in Illustrator, make sure to scale the artwork appropriately. If you used metric measurements in Fusion 360, then change the Scale units to 1 millimeters.

Highlight all of the lines, and then unselect the shape surrounding the design.

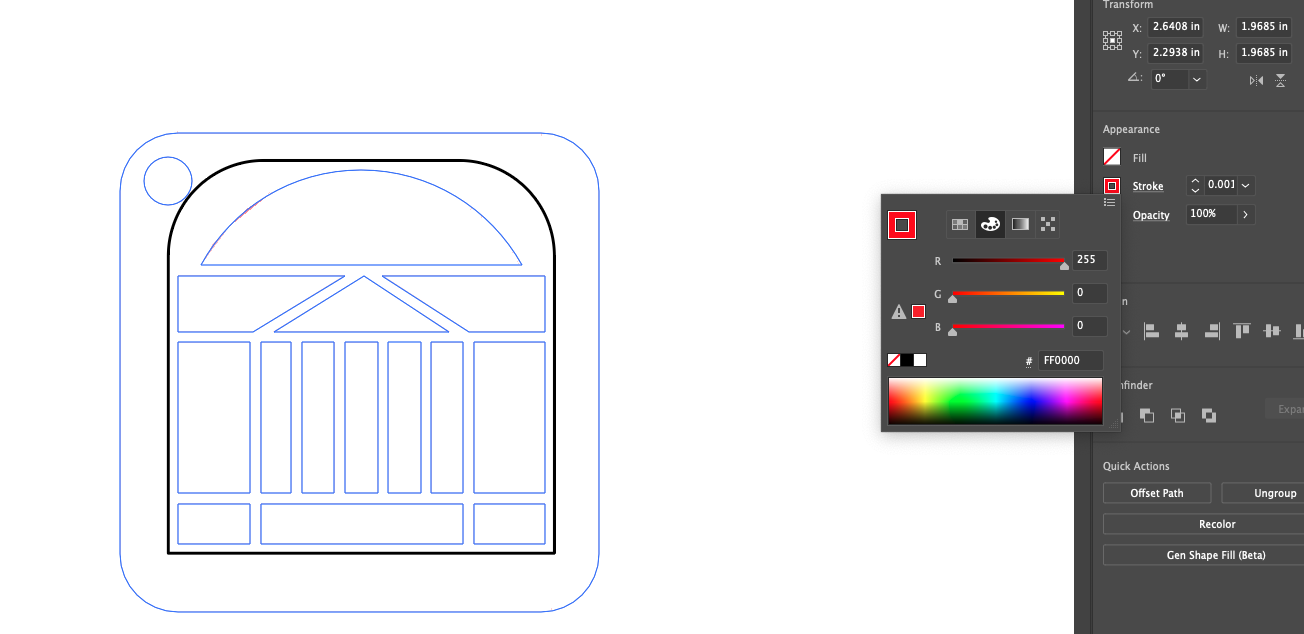
Change the color of the stroke to red, #FF0000, and 0.001 inch stroke width. All of these very thin red lines will be cut.

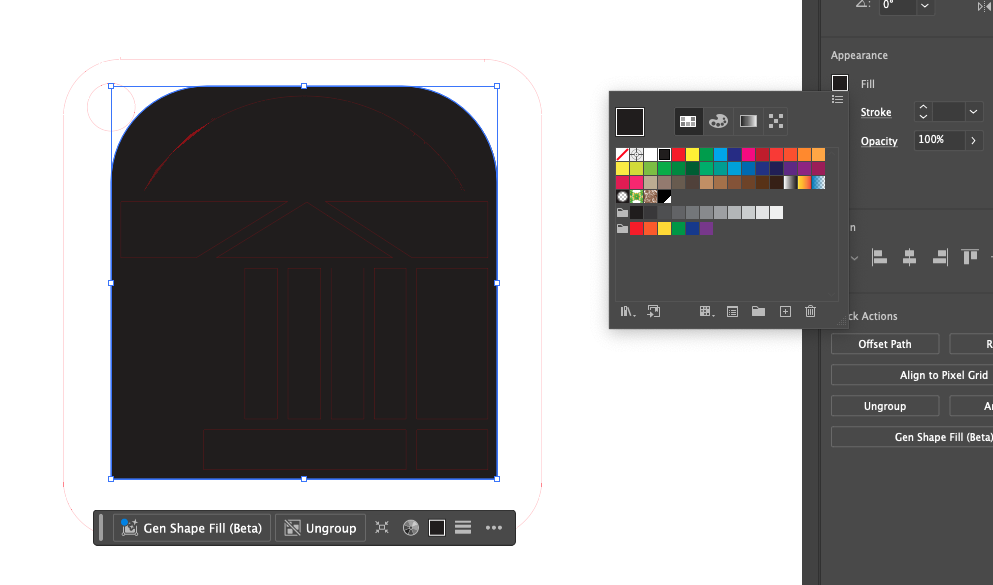
Then select the shape around the design. Turn the stroke off and change the fill to black, #000000.

Print the file and make sure the VLS6.60/75 is selected. It should be by default.

Hit the print button again.

Laser Cutter Software

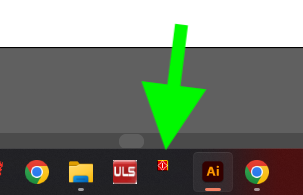
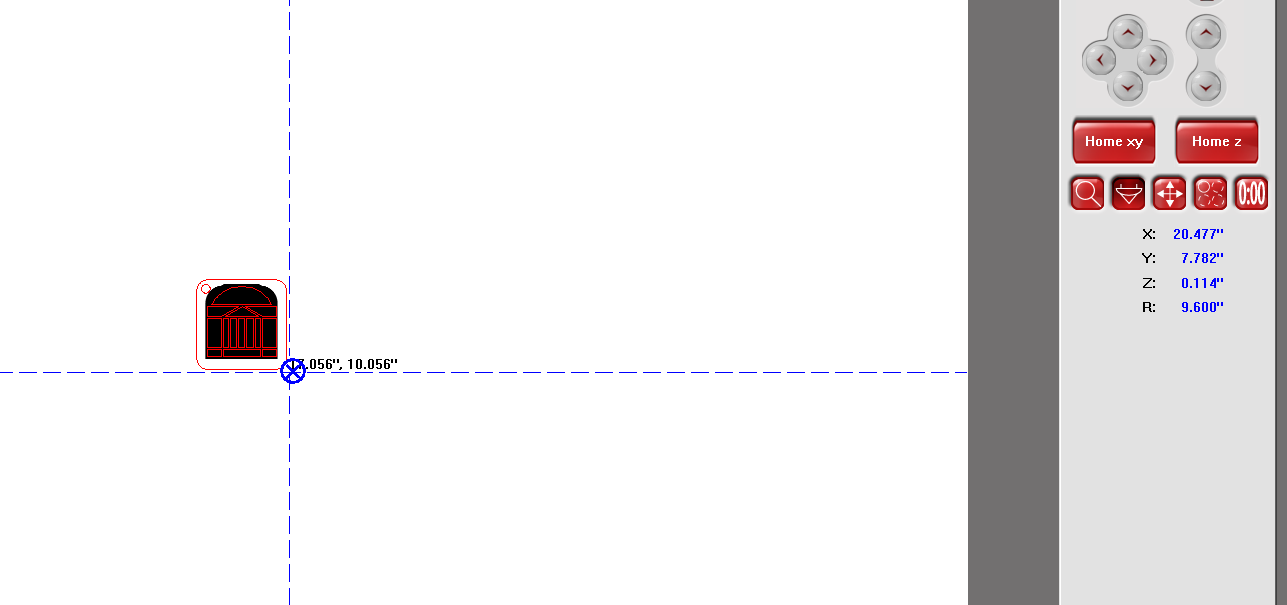
Open the laser cutter software by clicking on the icon in the app tray:

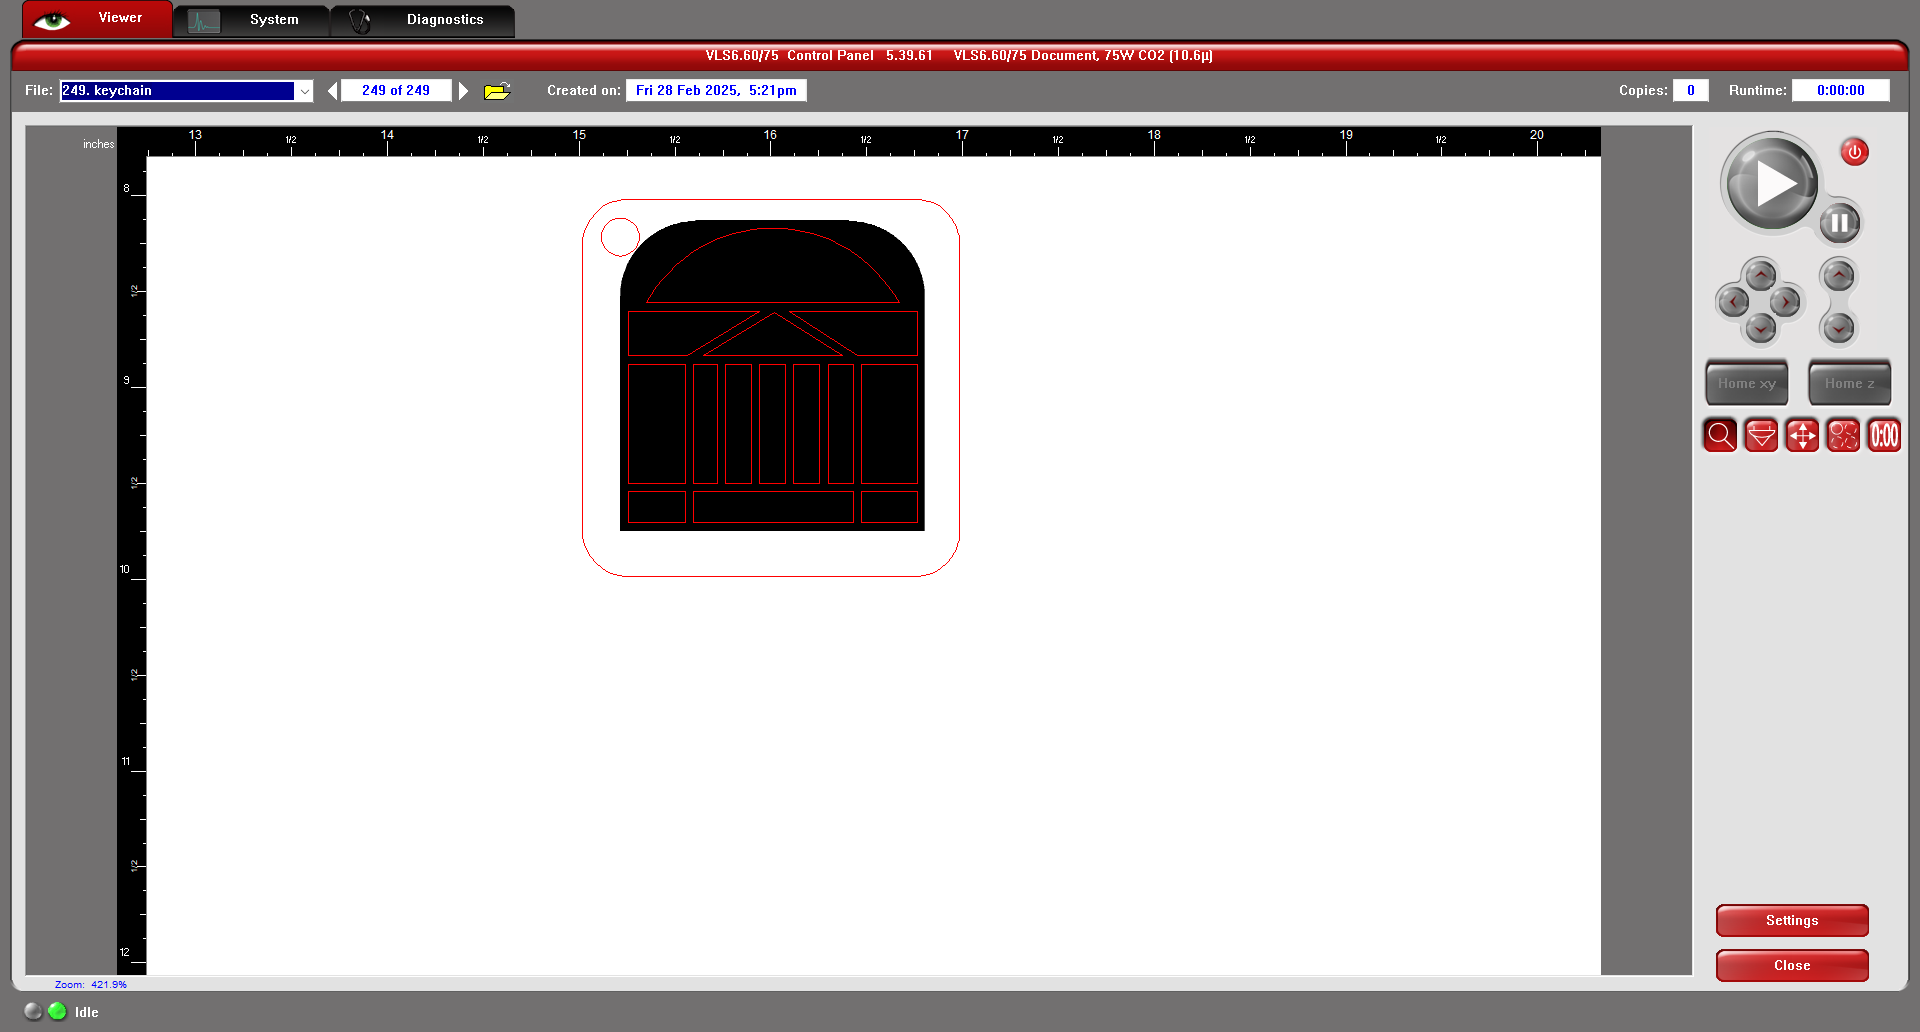
You should see the image from Illustrator in the Viewer screen. The red lines will be cut out. The black shapes will be engraved. The engraving will burn out just enough material for the 3D printed part to fit right in.

Set the Material

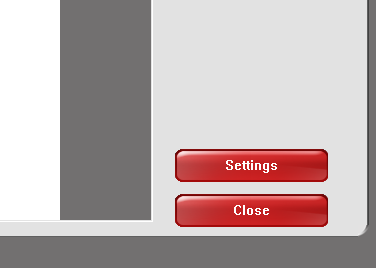
The very first thing to do is set the material used and the width of the material. Click the Settings button.

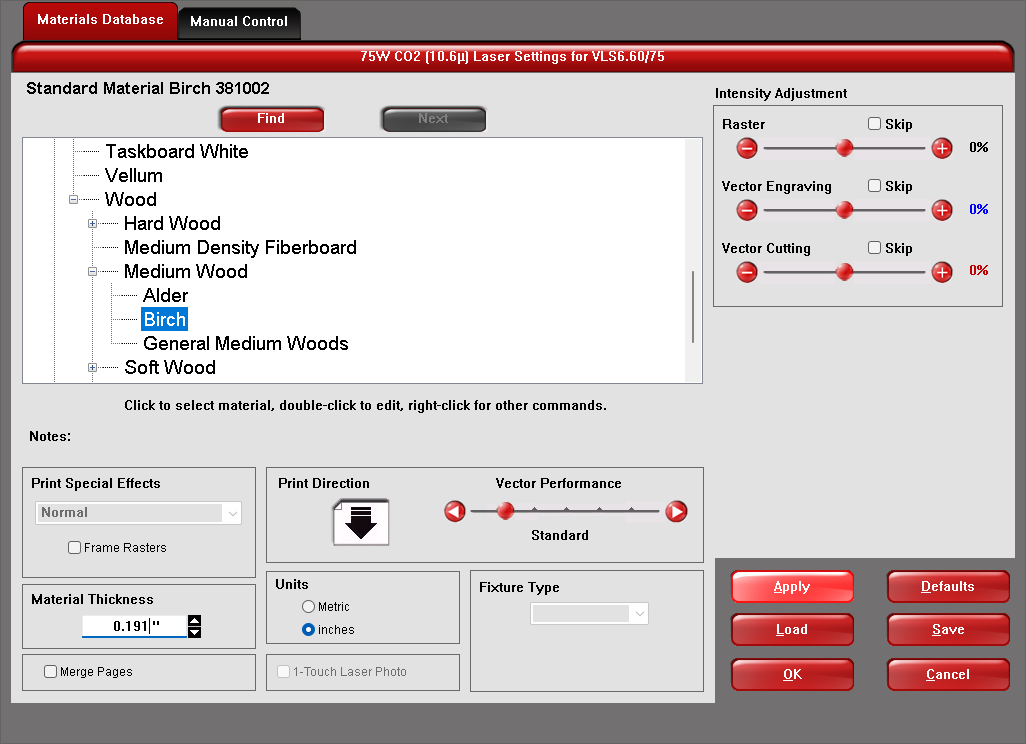
In the Materials Database dialogue box, select the correct material (use Birch if you are using the thin birch plywood). Measure the thickness of the material and enter that into the Material Thickness section. Make sure to enter the numbers, then hit Tab on the keyboard, then click the Apply button. If you do not do it in this order, the thickness will not be saved.

After making changes, always make sure the Apply button is grayed out. Then click OK.

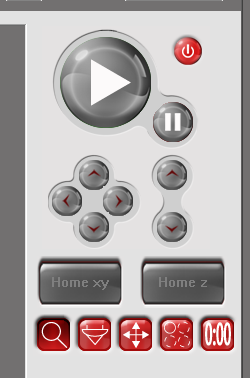
Now you can turn on the laser cutter, which will turn on the exhaust system. You must wait until the exhaust system is fully running before starting the print/cut job. Click the power button to turn on the laser cutter.

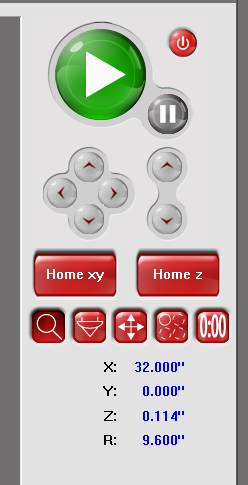
When the exhaust is fully on, and the laser cutter is ready to cut, the play button will turn green.

You can check that your material is placed correctly by lifting the lid on the laser cutter, pressing the focus view icon and clicking next to your keychain shape in the Viewer.

The carriage will move to that point and if the lid is open, it will shine a laser pointer light on your part. Check multiple places to make sure the material is sufficient for the part to be cut out.

Once everything is in place, click the big green play button.

Remember to stay by the laser cutter the entire time that your piece is being cut.

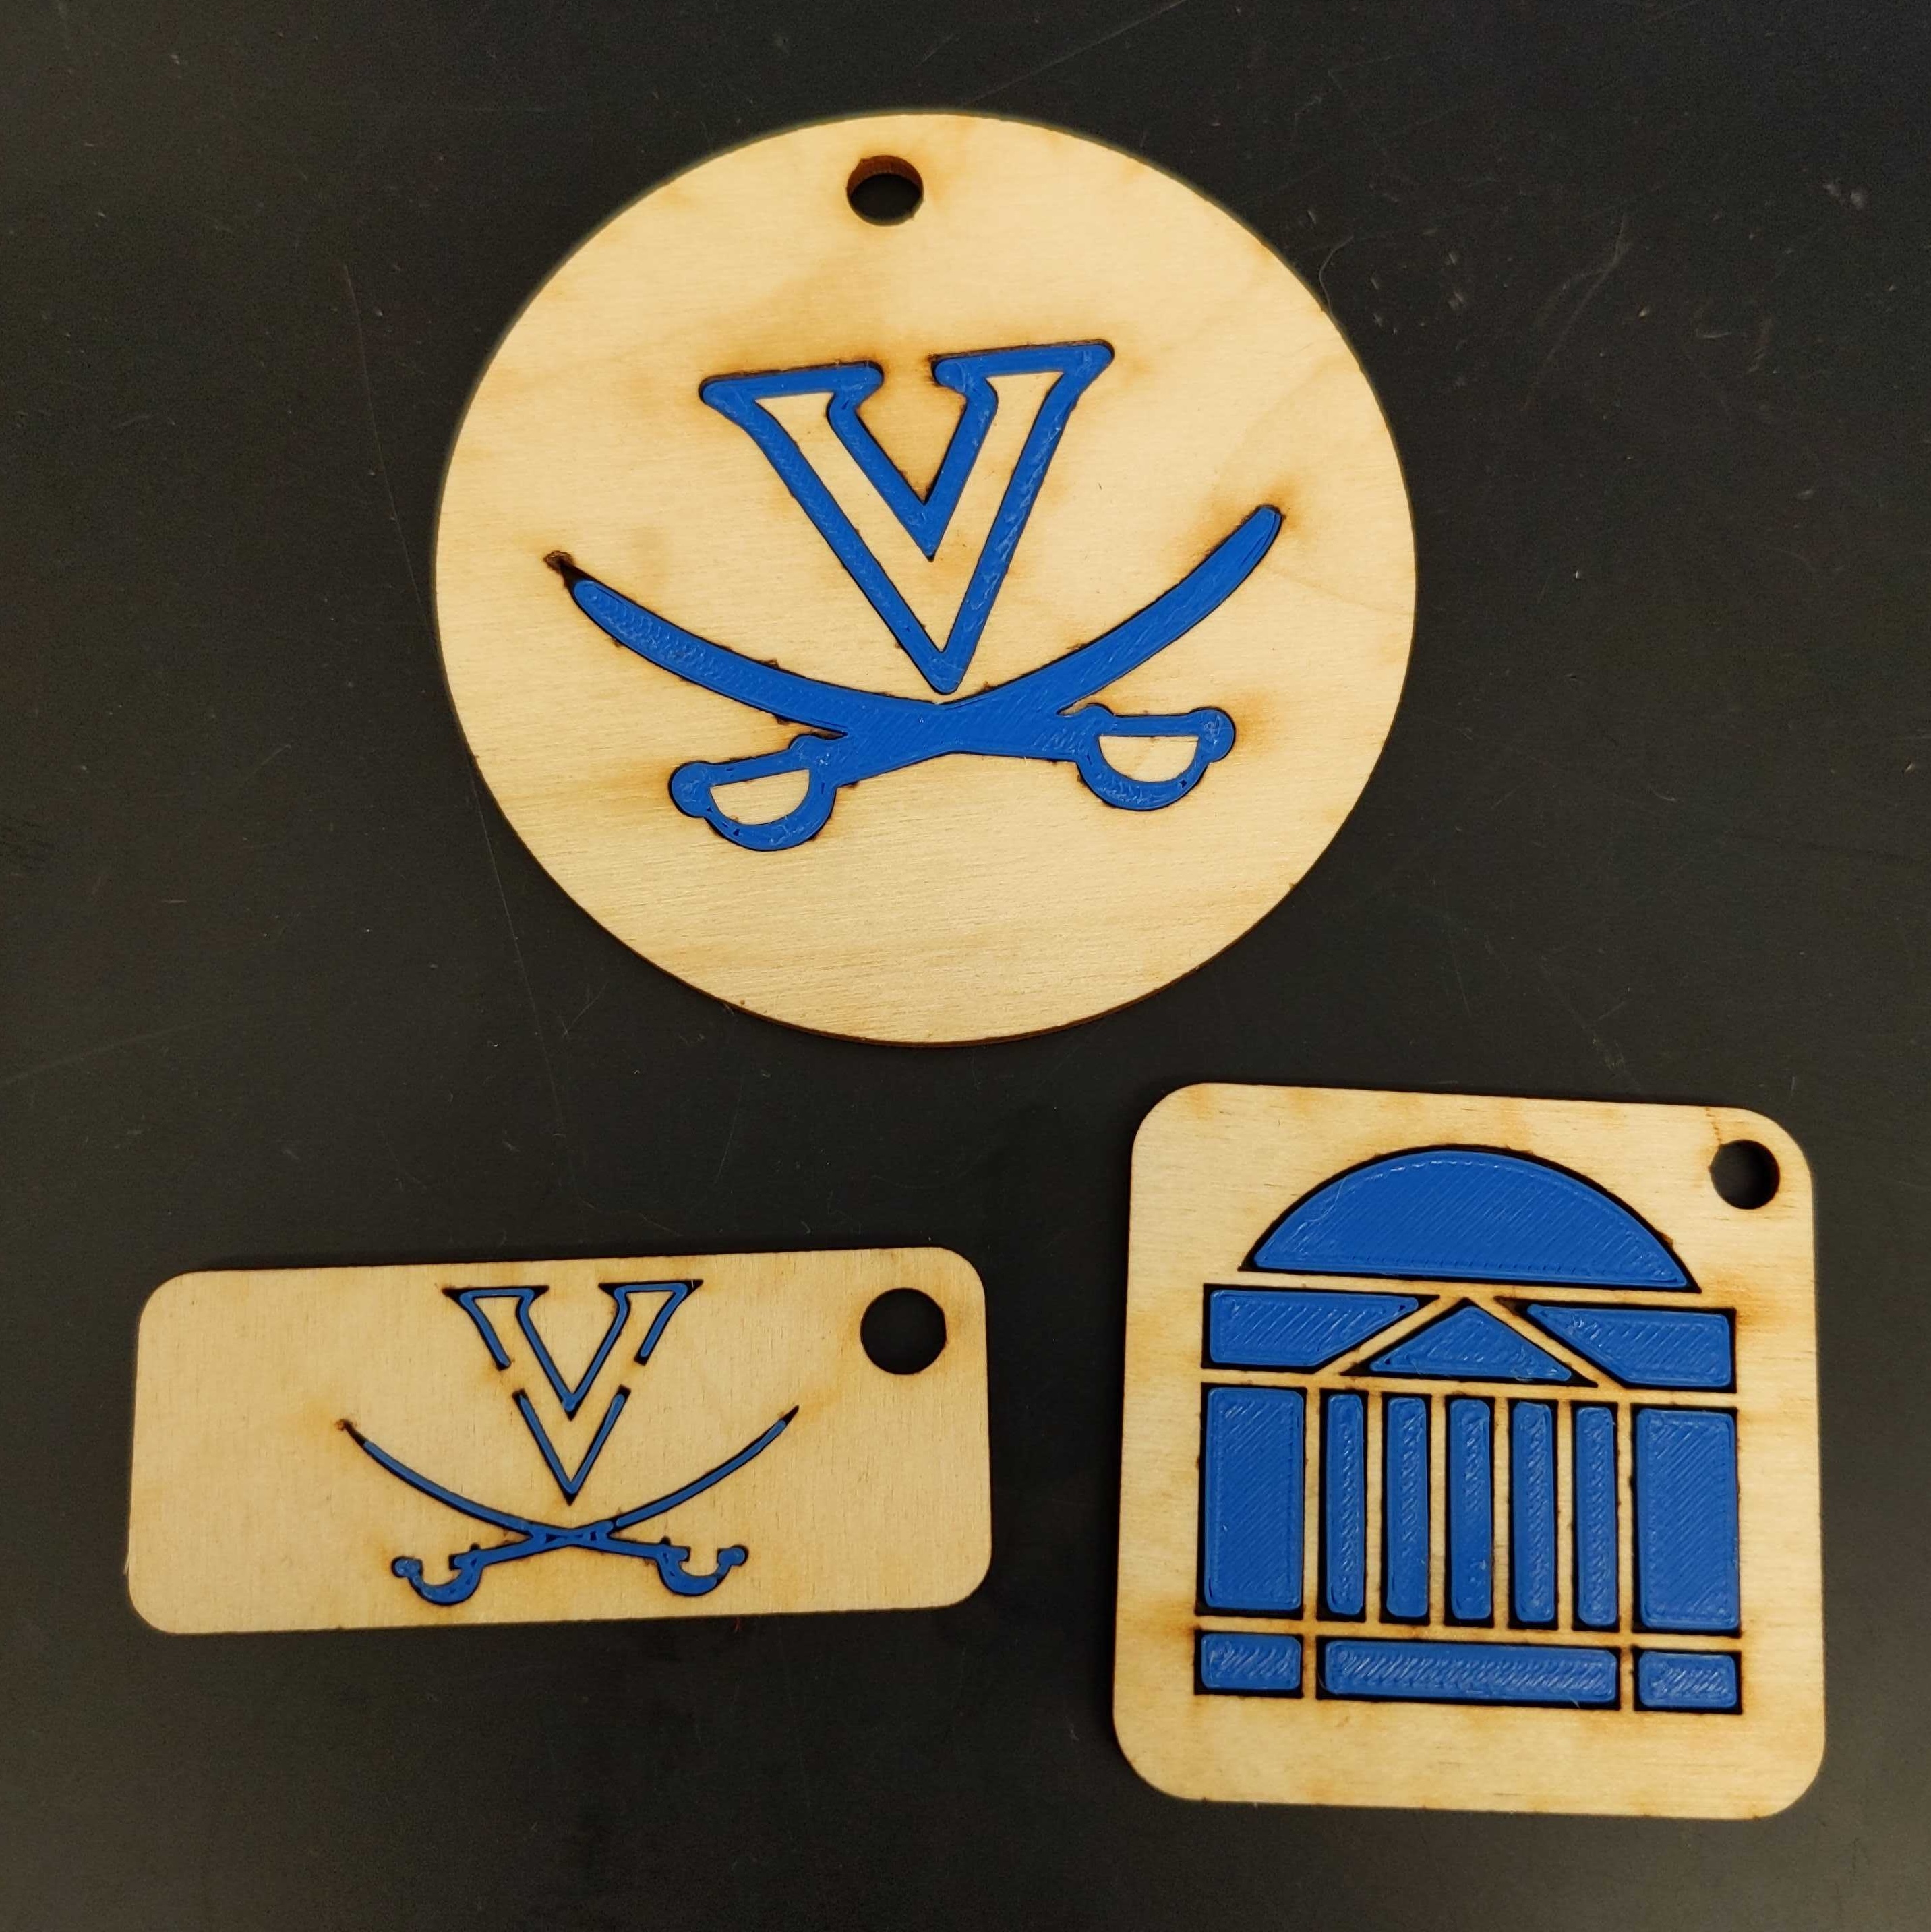
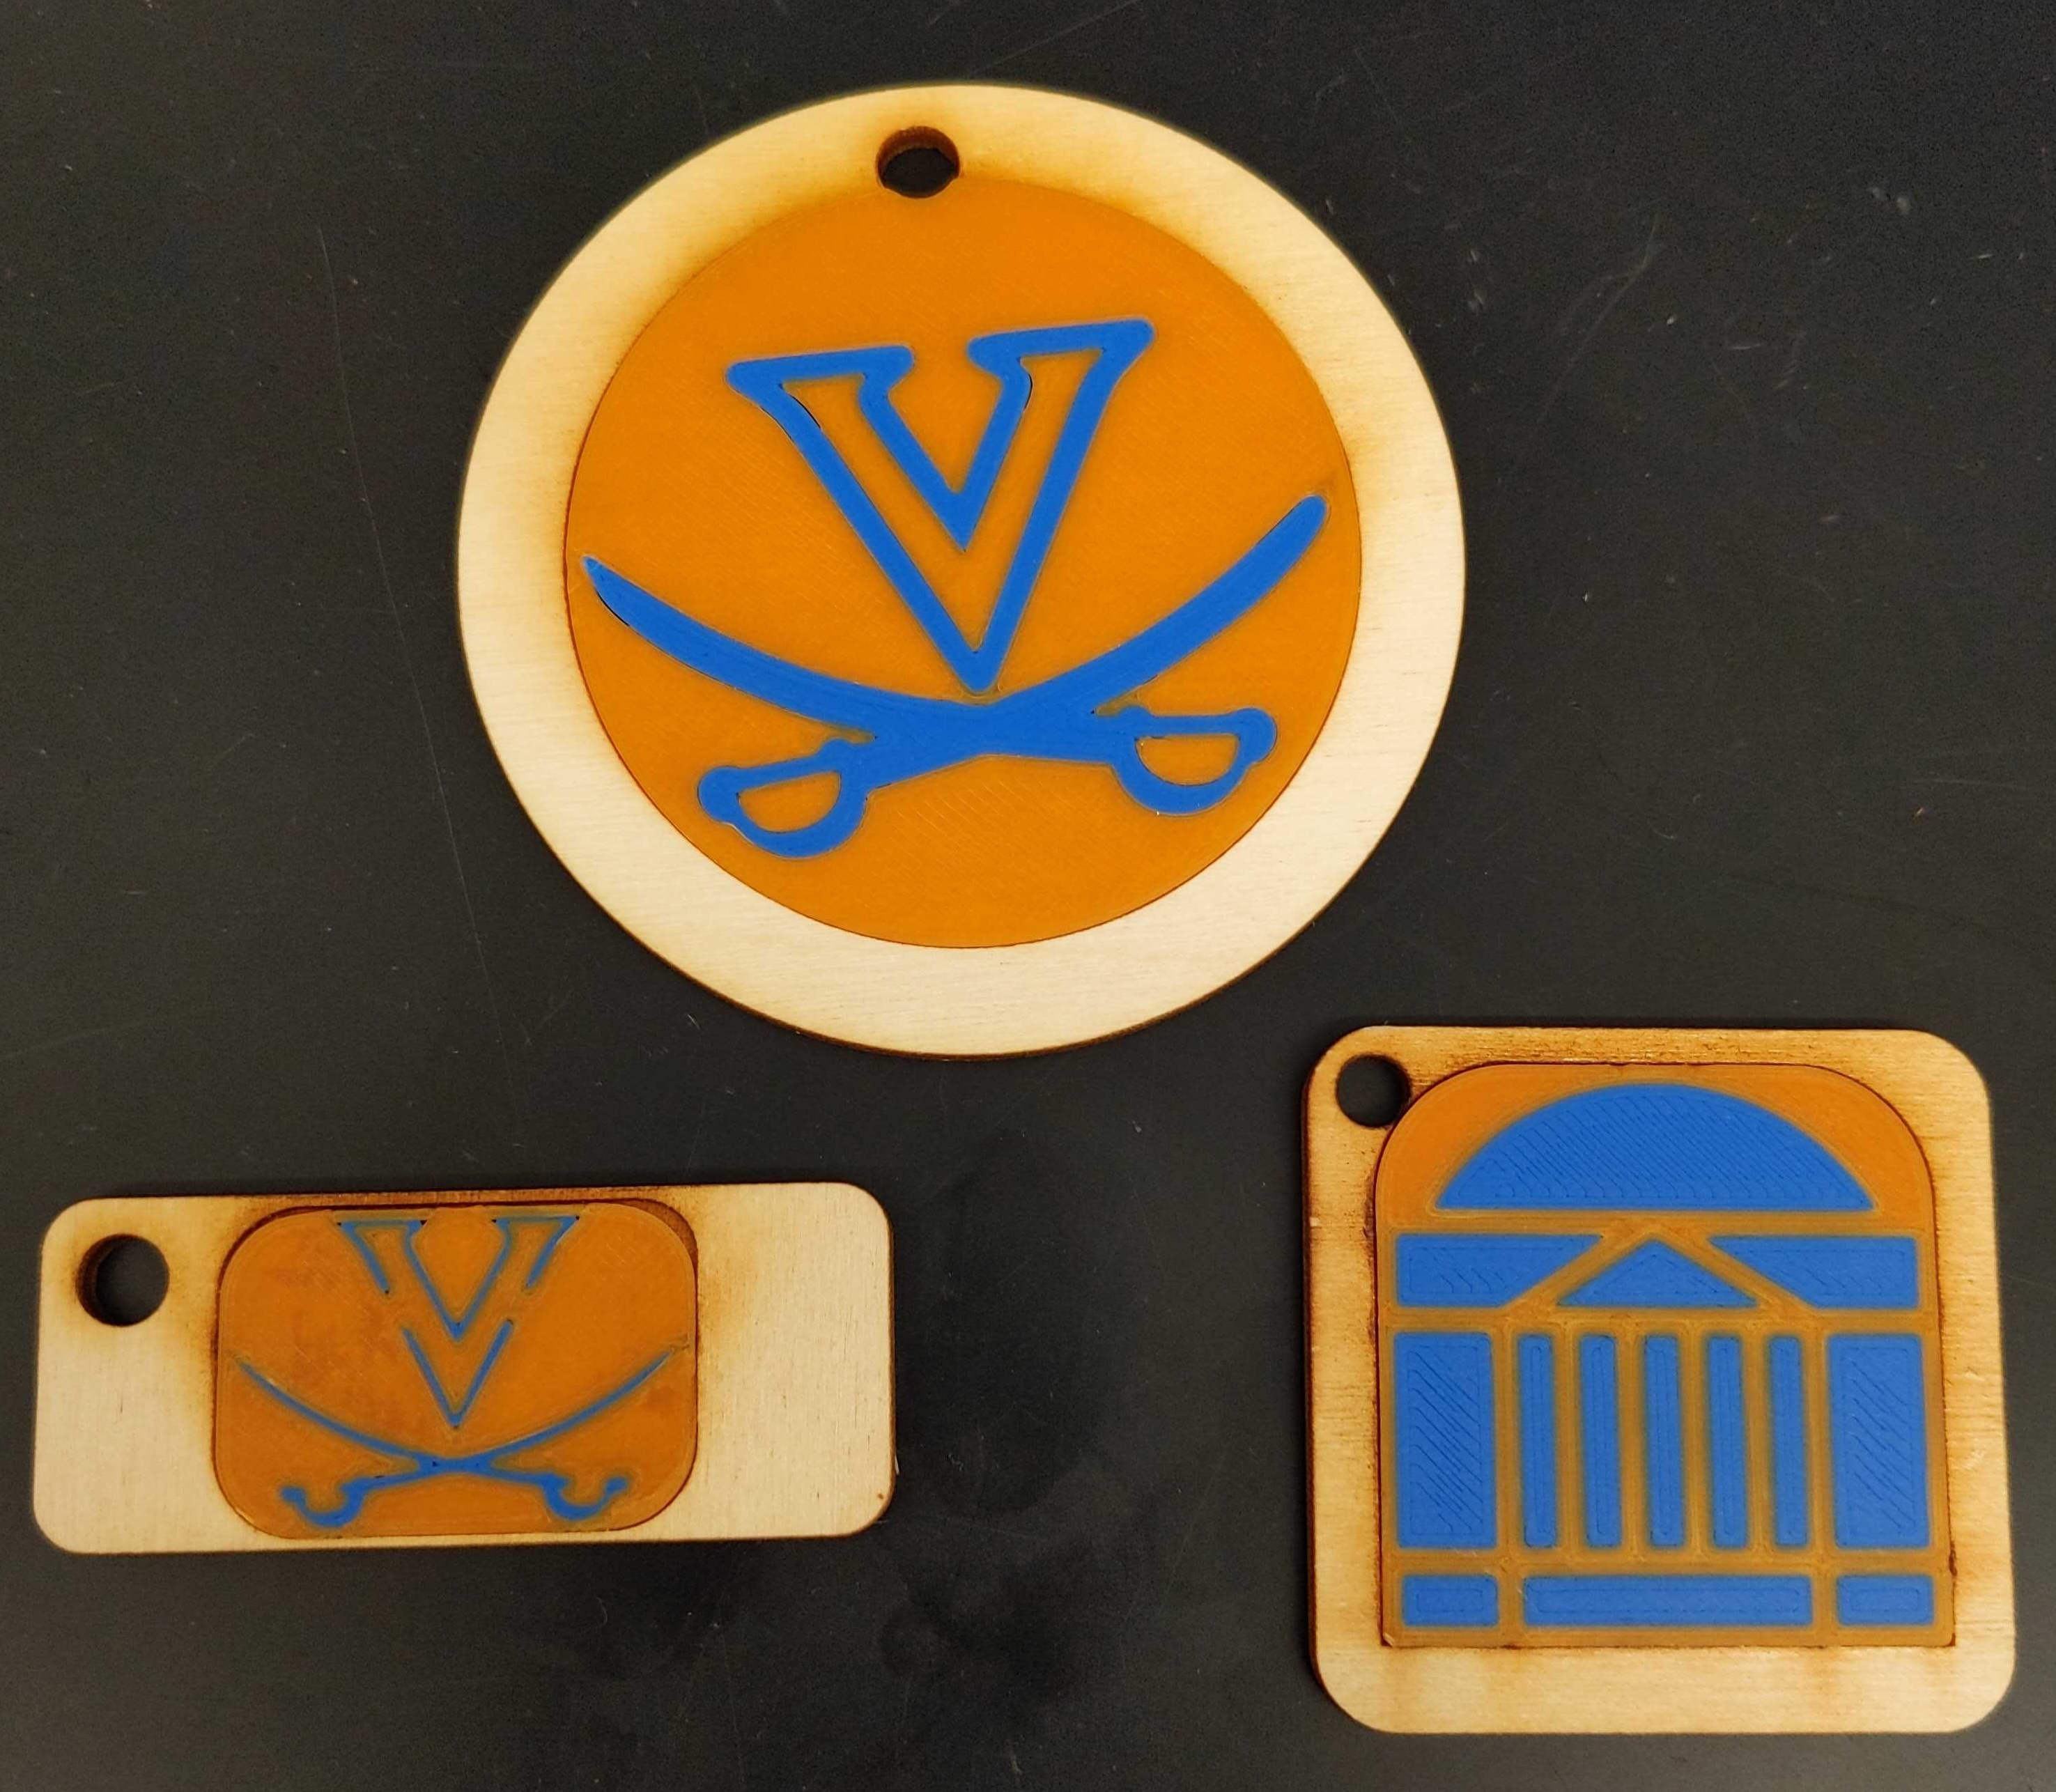
Result

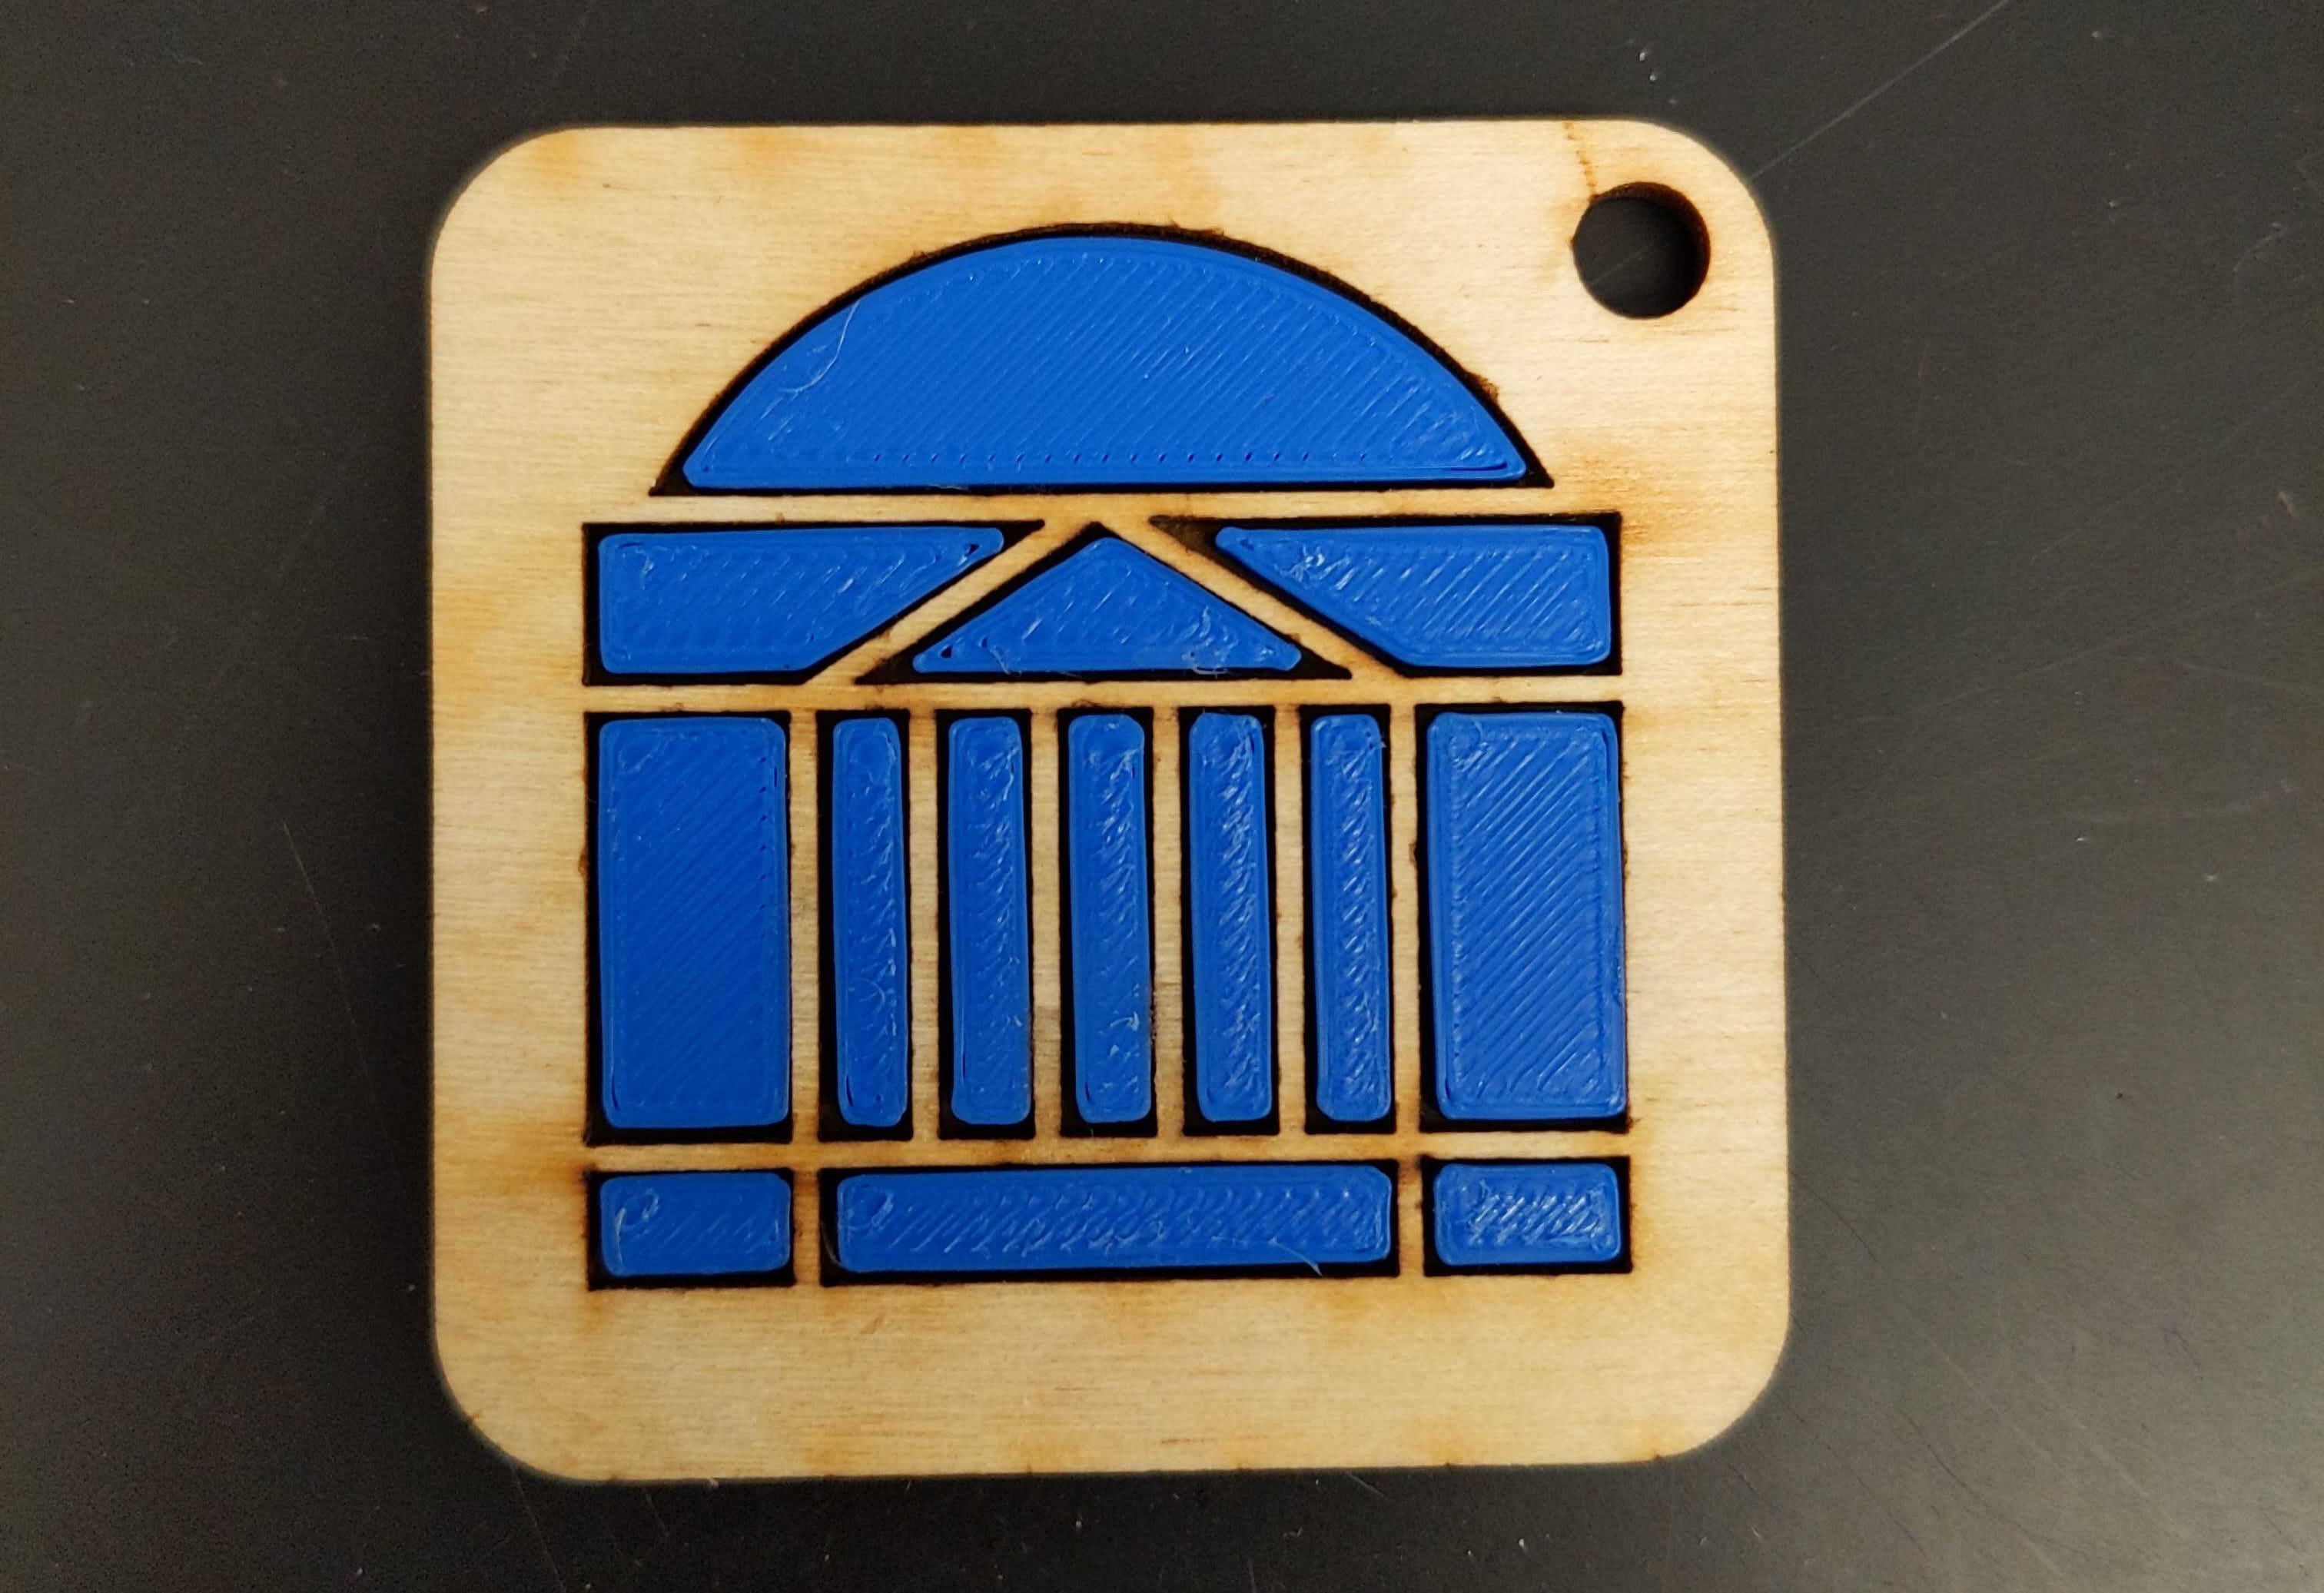
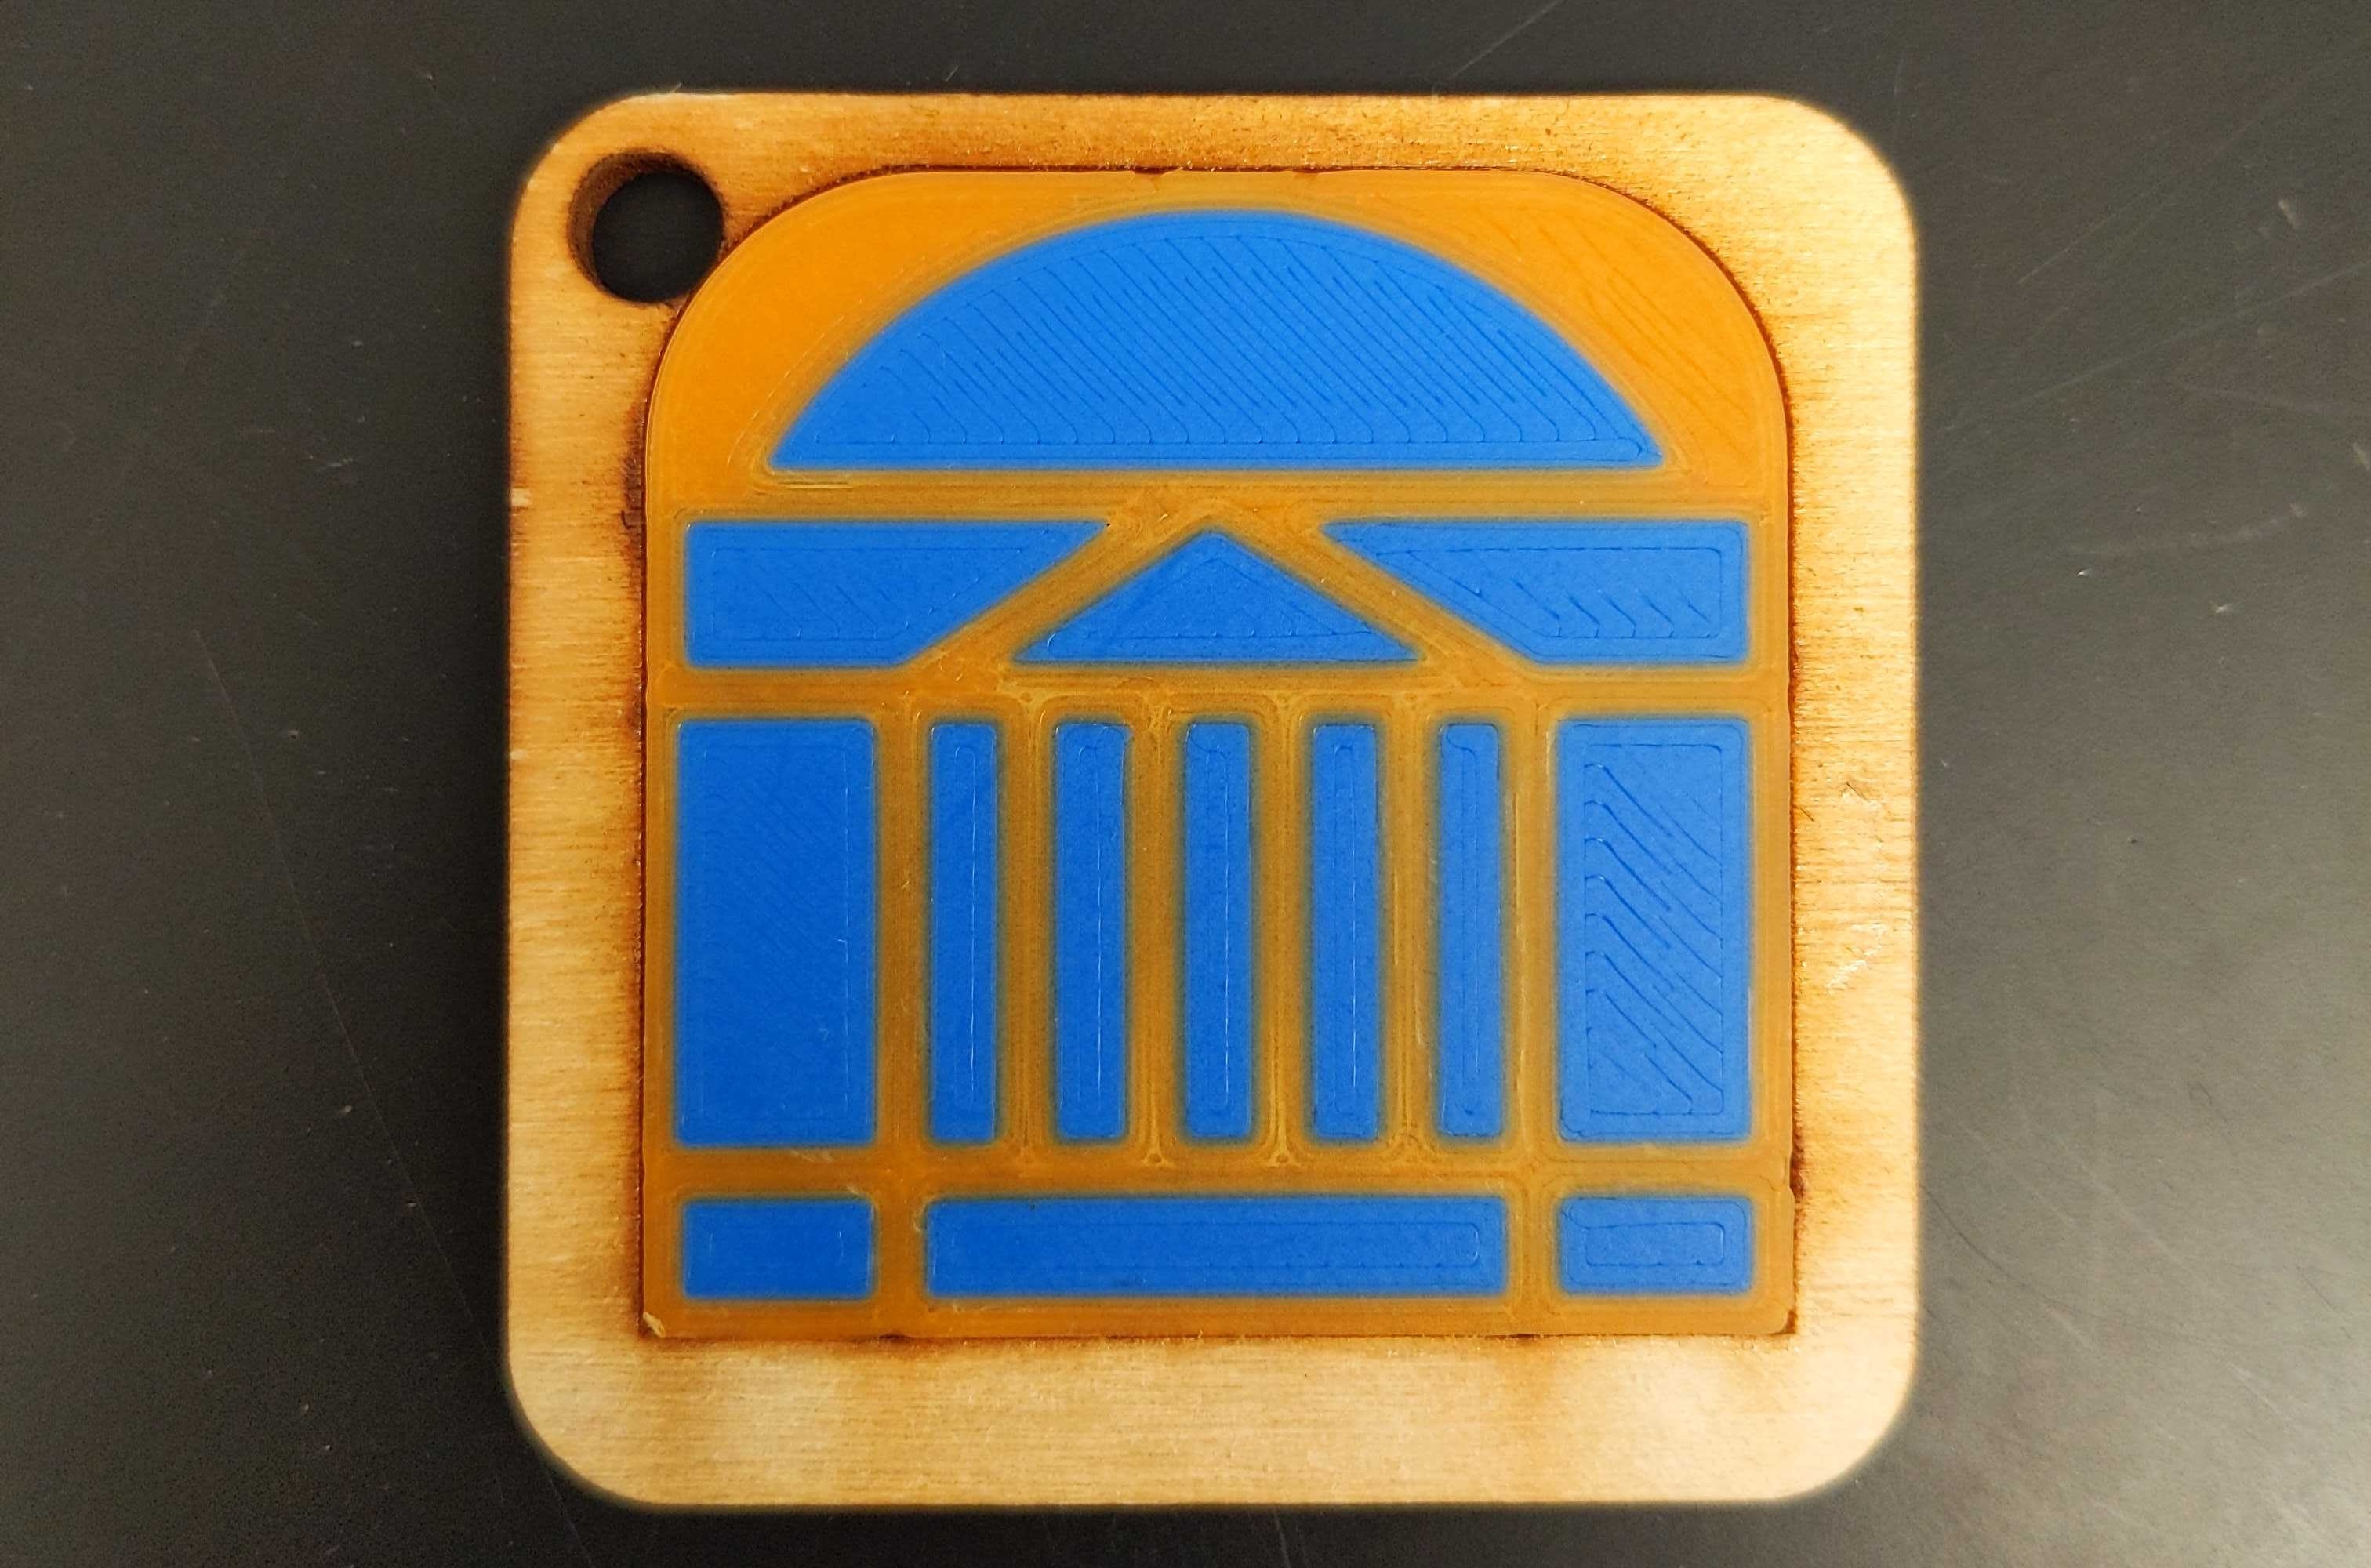
And voila, you have some laser cut and 3D printed keychains. You can also make them with words. Just make sure to decide if the legible side is the 3D printed side or the other side.

  •  

Print-Ready Web CV

I keep my running CV on my website for a few reasons. It keeps everything in one place. It’s handy to point students towards when they have questions about how to list things on their own CV. It lets me pull in some quick stats on my blog posts using Jekyll. But I’ve always run into problems when it comes time to submit my CV as an actual document. Copying the page over to Microsoft Word brings in all the detritus of my web styling and structure, and I have to dutifully edit those elements out before submission.

I described this problem to Jeremy Boggs, our Head of R&D, and he immediately suggested that I look into making a print stylesheet for my CV page. I knew you could use CSS to style the ways your web page gets printed, but I’d never actually played around with it before. Now I’ve got things going such that I have far less to do when I go to submit my CV. This post documents that process.

The first thing I needed to do was get a way to preview what I was looking at. By default, your developer environment won’t render your print styles unless you go to print a page and look at the preview that pops up. I followed this set of instructions for getting Google Chrome to emulate my print styles in the browser as I worked.

Now that I can see my work, my first real step is to make a new print stylesheet and link it to my site in the head of my default template. This print stylesheet is fairly specialized to a single page, so I wrap the reference in an if statement so that it is only included on that particular page.

_includes/head.html

{% if page.title == "CV" %}
  <link rel="stylesheet" href="{{ site.baseurl }}/styles/print.css">
{% endif %}

Now that the stylesheet is included, I start to build up a styles/print.css file one piece at a time based on the things I want to change. First off was hiding web-only materials like the nav bar and the masthead.

styles/print.css

  /* Hide web-only content  */
  header, nav, h1.page-title, #web-title{
    display: none;
  }

But I actually do want some material as a masthead. I implement this by actually having some content on the web that is only rendered to the browser if it is printed. This becomes a part of the masthead, contained in my default layout for my jekyll site.

_layouts/default.html

<div class="print-only" id="print-title">Brandon Walsh | walsh.brandon.michael@gmail.com | @walshbr</div>

And then it only appears when printed by specifying a print-only class for those elements that I only want when printing.

styles/print.css

  .print-only{
    /* Display print-only content */
    display: block;
  }

The web version of my CV does not span the whole width of the page, which is good for readability on the web but a problem when printing. So these settings create a more typical one-inch margin for the document. Another interesting issue I ran into was that some printers by default will include metadata - date, page number, time - on the page for printing. The margin settings below cut that off.

styles/print.css

  div.container.content {
    /* normalize content sizing for printing */
    max-width: none !important;
  }

  @page {
    /* hide printer-specific information that would otherwise get added */
    margin:0;
    padding: 1in;
  }

And then finally I got down to the actual task of setting up some basic stylings that make it a little less web and a little more print. I switch fonts, change the text size, and revert to default URL text decorations for the sake of the genre. In the past I’ve found that my link styles, especially, look very strange when copied over to a print document.

styles/print.css

  html, h2, h3, #print-title{
    /* set print-ready font and text size */
      font-family: Georgia, 'Times New Roman', Times, serif; 
      font-size: 12px;
  }

  a{
    /* Normalize URL colors */
      text-decoration: underline;
      color: blue;
  }

One stretch goal that I haven’t fully implemented: I commonly need a quick way to cut my CV down. There’s no good way to do it programmatically with any real level of precision, but Jeremy showed me how to do a rough cut that works well in a pinch. I’m using Jekyll by default, which will give ID’s to all of my headers that match the titles. Jeremy showed me how to use CSS selectors to selectively hide whole batches of content based on those ID’s. The following CSS would hide all of my service commitments. Not really super useful to do a lot of, but maybe helpful to know about!

styles/print.css

/* example for how to hide specific sections */
/* 
h2#professional-service-and-affiliations,
h2#professional-service-and-affiliations+ul,
h3#local-service-washington-and-lee,
h3#local-service-washington-and-lee+ul,
h3#local-service-university-of-virginia+ul{
  display:none;
} */

That’s it for now. Much more that I could do, but this serves my needs nicely. And here’s a quick side-by-side of the first printed page to see how the new print.css sheet stacks up.

First the original print, which is a pretty close copy of the web version:

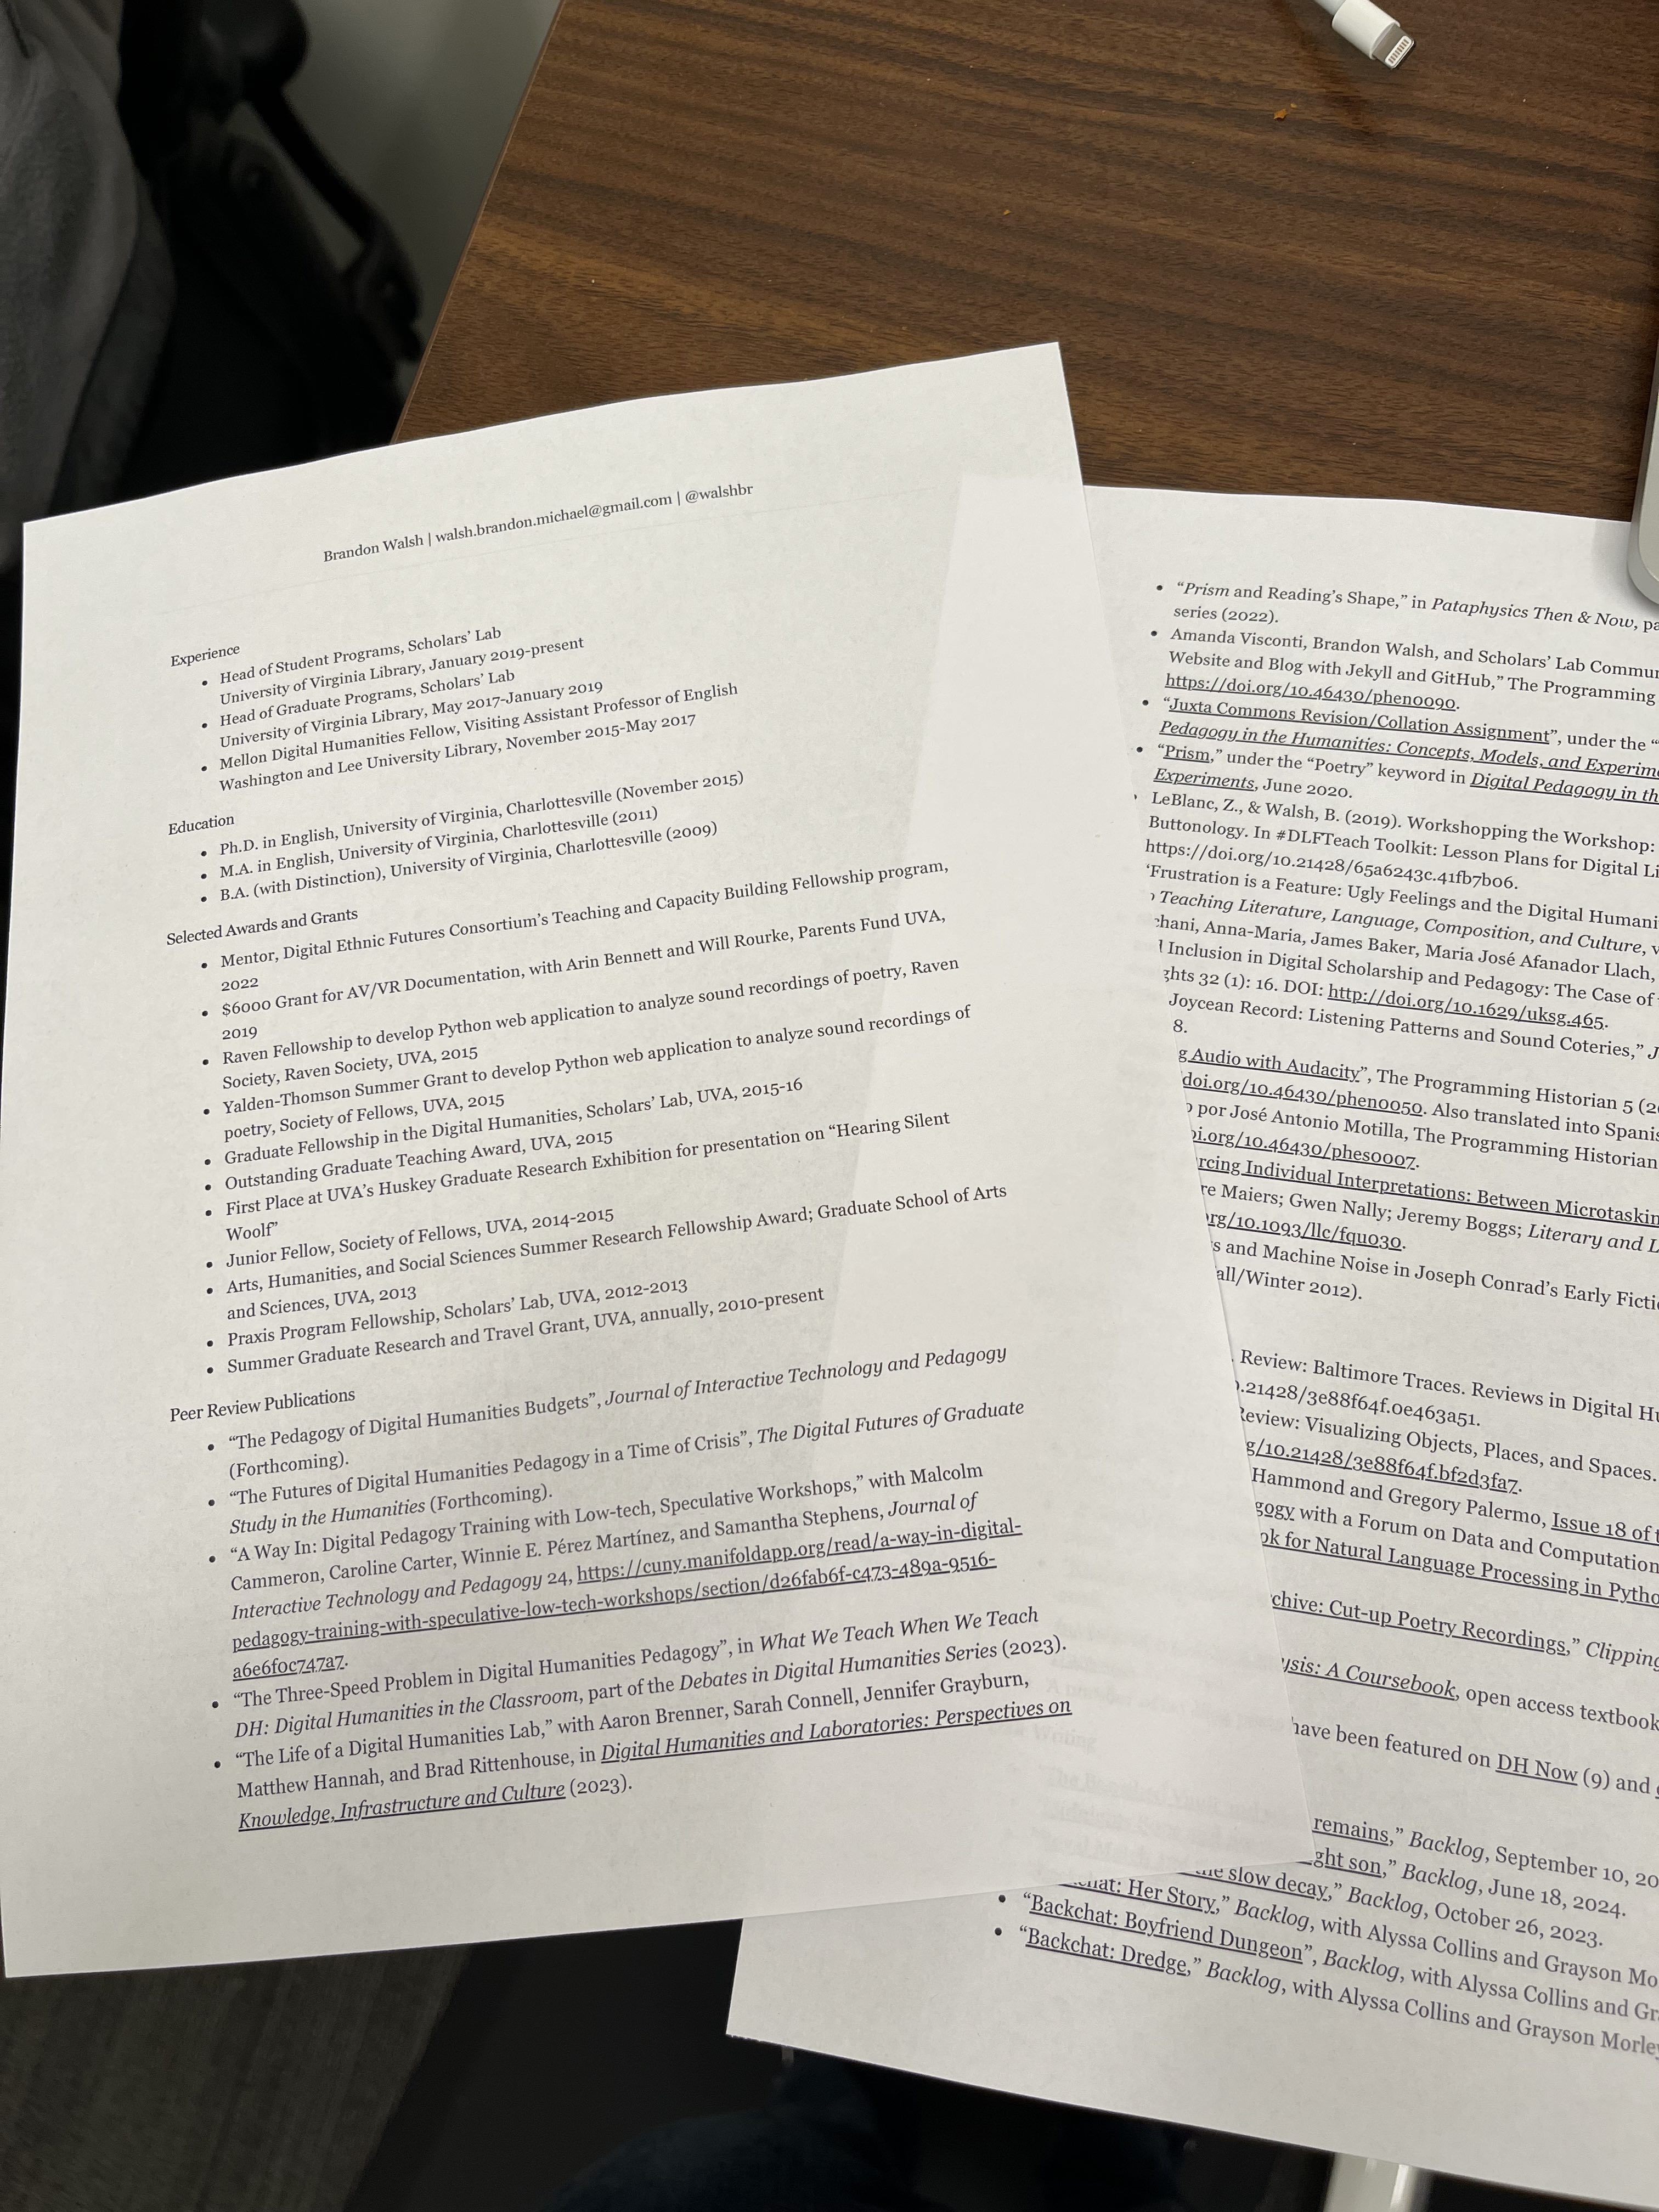
original printed cv

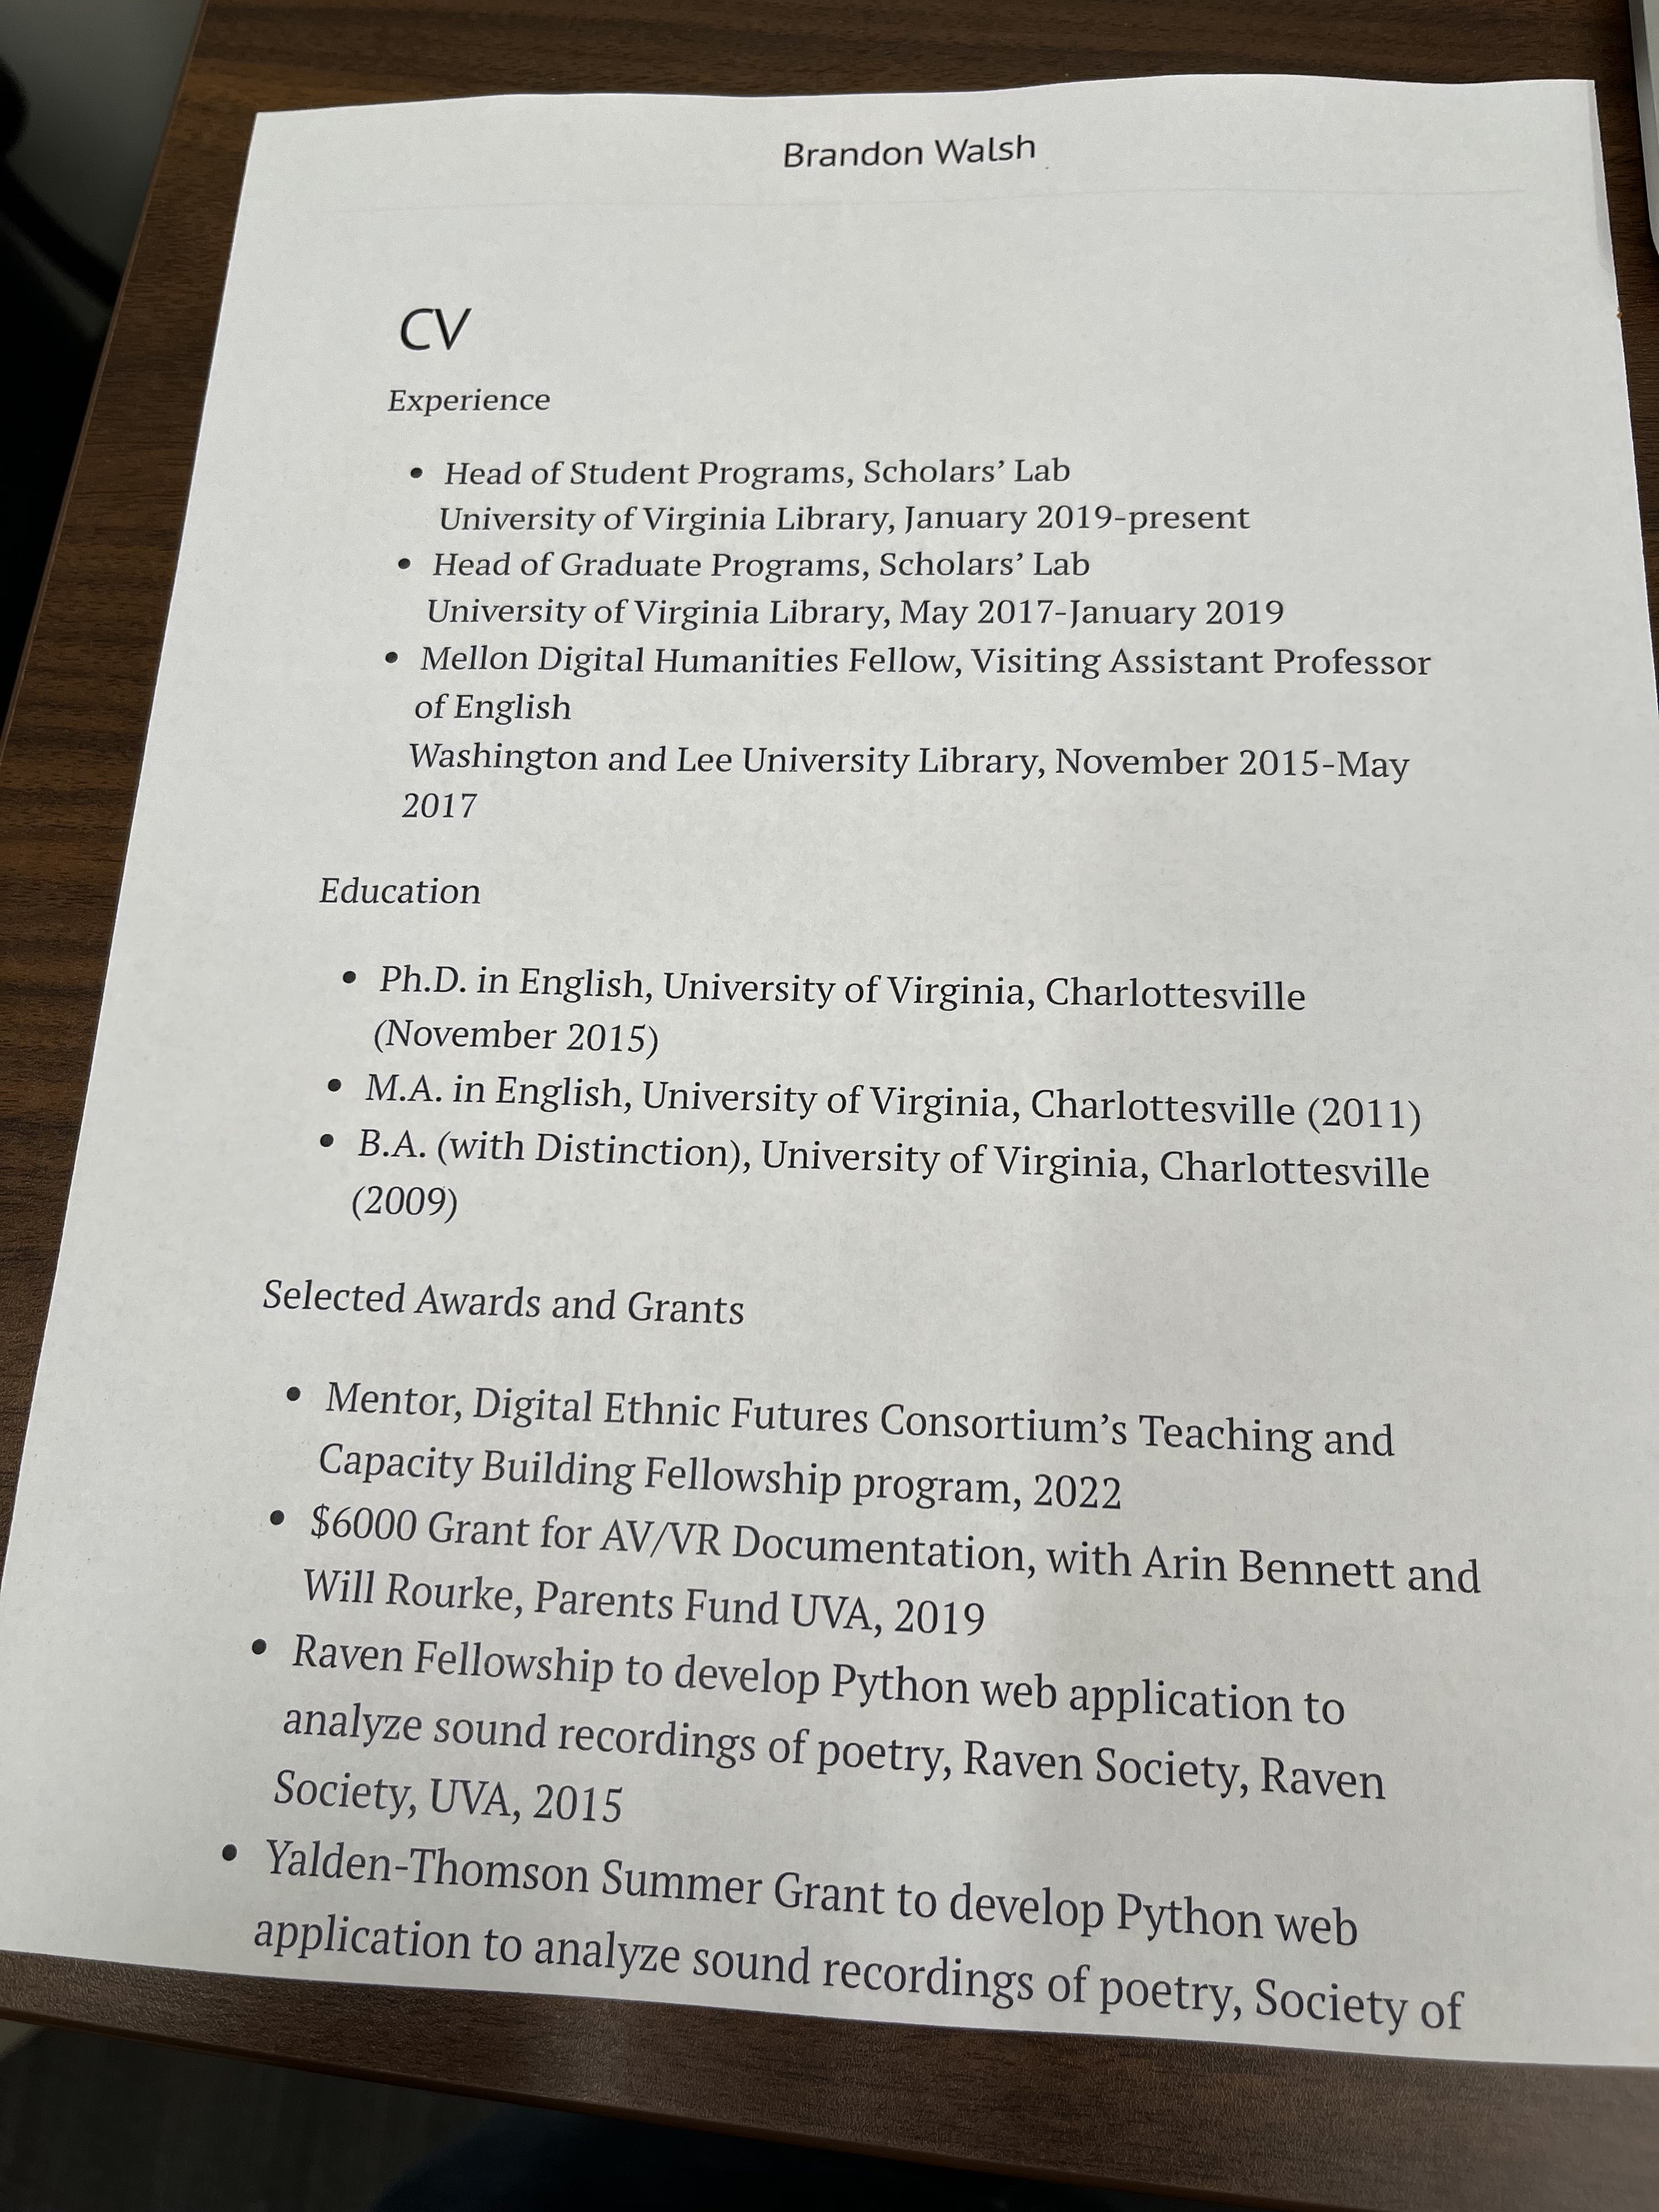
And now the new one with a print stylesheet incorporated. Much more usable as a CV! I could save it as a PDF to submit.

printed cv with a stylesheet - looks much more like a cv!

I’ve pasted the full contents of all the relevant files as they stand in case you’re interested in replicating.

_includes/head.html

{% if page.title == "CV" %}
  <link rel="stylesheet" href="{{ site.baseurl }}/styles/print.css">
{% endif %}

_layouts/default.html

<div class="print-only" id="print-title">Brandon Walsh | walsh.brandon.michael@gmail.com | @walshbr</div>

styles/print.css

@media print {
  
  /* Hide web-only content  */
  header, nav, h1.page-title, #web-title{
    display: none;
  }

  .print-only{
    /* Display print-only content */
    display: block;
  }

  div.container.content {
    /* normalize content sizing for printing */
    max-width: none !important;
  }

  @page {
    /* hide printer-specific information that would otherwise get added */
    margin:0;
    padding: 1in;
  }

  html, h2, h3, #print-title{
    /* set print-ready font and text size */
      font-family: Georgia, 'Times New Roman', Times, serif; 
      font-size: 12px;
  }

  a{
    /* Normalize URL colors */
      text-decoration: underline;
      color: blue;
  }

/* example for how to hide specific sections */
/* 
h2#professional-service-and-affiliations,
h2#professional-service-and-affiliations+ul,
h3#local-service-washington-and-lee,
h3#local-service-washington-and-lee+ul,
h3#local-service-university-of-virginia+ul{
  display:none;
} */

}

  •  

Running a DH Mock Interview

One thing that helped me a lot as a graduate student was the Scholars’ Lab’s willingness to aid me in preparing for job interviews. I had no idea what to expect, so the practice was hugely beneficial for me—as was the coaching in what a mock interview might look like at all. Now that I’m on the other side of the table and offering them myself, I thought I would document how I run mock interviews in case the information is useful for others.

The Process

You’ll first want to assemble 1-2 other interviewers for your mock committee. Part of the strangeness of interviews is the discomfort of managing a one-sided conversation. You’ll want to mirror that for students if you can. Since interview—and, accordingly, mock interview—requests come up very last minute, it’s helpful to know who in your community might be interested in participating in the process. I often find staff are very happy to accommodate these last-minute requests once they have done them once, but giving them a bit of a heads up that they are in the pool of potential interviewers can help encourage participation in the future. I also try to select people likely to be familiar with the kind of job in question, so pre-gathering a pool of participants can help you identify areas in which you could use some help.

Once you have the group together, share the following documents with them ahead of time:

  • the position description
  • the student’s job materials
  • the plan for the mock interview (including questions to ask)

In an ideal world the committee will familiarize themselves with all the relevant materials, though since these things are often scheduled last minute I never assume this is the case. I usually plan to convey a lot of the information verbally when we meet as a committee.

Schedule 90 minutes for the mock interview, though 60 minutes will work if necessary. I typically use this format:

  • 10 minutes to brief on the plan for the session and give general interview thoughts
  • 60 minutes for the mock interview
  • 20 minutes to debrief, give feedback, and discuss

From there you should be ready to carry out the mock. More guidance follows about how to facilitate each specific part of the interview process for your student and your collaborators.

Part 1 of the Interview: Discussion of the Mock Plan

Since most students come to us without much experience at all interviewing, let alone for the subset of alt-ac or DH positions, I typically open with just a few minutes discussing interviews in general. I often note that these types of positions are not quite full academic positions and not quite standard tech jobs. Discussing the posting ahead of time might help to give students some sense of what they can expect, as each position is unique. For example, postdoctoral positions come in many flavors. Some might be more like pre-faculty fellowships, with a heavy focus on personal research in addition to staff responsibilities. Others might be more flavored as pre-staff positions with limited research time. Temper expectations accordingly with a bit of context about the position.

Plan to mirror the format of the interview—phone, Zoom, or in-person. It’s important to practice as though it were the real thing. Each format is awful in ways that can’t be anticipated ahead of time. I typically discuss the particular weirdness of the selected format with the student quite frankly. I have seen pretty shocking things in the background of zoom interviews before. It happens. Best not to be thrown but also keep in mind how you can minimize the risks of such things for yourself.

Many formal searches have HR requirements that require interviewers to ask the same questions of each candidate. These rules carry a lot of ramifications. Committee members might ask follow-up questions, but back and forth conversation is likely to be minimal. Interviewers might aggressively be taking notes while you talk. The committee will typically move person by person down the line and each read questions from a prepared list. These procedures can give the feeling that you have no real rapport with the people in the room because you get little response visually or verbally to much of what you say. All of this is to say: the awkwardness is not you. It is almost always a reflection of the format, where people are trying to figure out who should go when, who should say what, what to do next, etc. Expect it.

I usually close by asking the student to take the mock as seriously as they would a real interview, up to and including trying their best to stumble through answers as they would for the real thing. This means avoiding the temptation to pass on any one question with a response like “well I should probably think about that more.” Just do your best—we can discuss later.

Part 2 of the Interview: The Mock Itself

The bulk of the mock is spent on the actual interview. I usually offer a few options for the mock committee. Questions can be drawn from experience and made up on the spot if they like, but I also provide a bank of examples based around different topics for my colleagues to use if necessary. During the mock, we alternate who is asking questions to mimic the odd experience of interviewing by committee. And we try to draw from across a spectrum of topics. What follows is an example list of questions I have shared with colleagues in the past. Note the first and last questions common to each mock, followed by a series of different categories we can move among at will.

  • First Question
    • What drew you to this position? Why this place?
  • Position-specific Questions:
    • We are really concerned about X problem local to us. How would you address it? (I often research for five minutes and come up with something ahead of time.)
    • We want to get more undergrads involved. How would you do that?
    • How do you get faculty to collaborate meaningfully with staff?
    • Do you want to use this as a faculty steppingstone (ideally yes or no depending on the position)? How can we help?
  • Research Questions
    • Describe your research and what you think of as your primary intervention.
    • How does your dissertation engage in digital humanities?
    • If you had to construct a through line for your work—dissertation through extra-curricular activities—what would it be?
    • What is your next big project? (might be book, a DH project, etc.)
  • Teaching Questions
    • What is your vision for pedagogy (especially re: DH) and how we might integrate it here?
    • How might that be translated to a curriculum or minor?
    • How does DH inform your approach to teaching?
    • What DH teaching have you done?
    • If you were to teach a DH course for us what would it be?
    • What kind of support do you need for teaching?
  • Community Questions
    • How do you approach collaboration? (push to talk about both technical and project management strategies)
    • What experience do you have with grant writing? One problem we have is that when we write grants then the money ends. What do you do about that? How could you have this position help us (and you) grow?
    • How do you bring students into your program when you’re a multidisciplinary org like ours?
    • How do you build community and visibility on campus?
  • Technical Questions
    • We are interested in how you would begin to design a digital archive. Talk us through it.
    • Hand a list of dates that have been formatted differently - What do you see here? Why does this matter? How would you address it? (an actual interview question I had once!)
    • What did you learn from your biggest technical failure?
  • Last Question
    • Do you have any questions for us?

I could go on and on, but these are just meant as a starting point. I typically flavor the questions a bit towards the specific job in question. For example, a DH Developer mock might have more technical questions than an interview for a DH Specialist. But I do think giving a broad spectrum of questions, difficulties, and topics can be helpful for students as they try to figure out what they can expect. Often just seeing a big list of example questions like this can be enough to spark a student’s imagination as they continue to prep on their own.

Part 3 of the Interview: The Mock Debrief

Perhaps the most helpful piece of the mock is the feedback that students will receive from the committee. Each person will have their own things that they noticed, but I often find that there are a few points that students might especially need to hear advice on.

Because students often feel like imposters, it can be easy to overwhelm them with feedback. So, we often open debrief sessions simply by encouraging them. They survived. They can do this. Be careful to consider—and frame—your advice in the context of the circumstances. If the actual interview is the next day, a student cannot expect to change their personality wholesale based on your feedback—and advice to do so might just make the student panic. Instead, emphasize those things that feel doable and learnable in the time allotted.

One way to do this is to start with the good that you noticed in the mock performance. Were there specific questions they responded well to? Can you help them to extrapolate that performance to a more generalized approach? Were there responses where they felt particularly light on their feet? It’s easy to focus on the bad, so the students might need your help seeing their strengths. And opening with these moments can offer a healthy frame for the conversation to follow.

Students often lack confidence in their own experiences and their ability to speak from them to the job at hand. I always encourage students to think about their current identities as students as a kind of superpower. Staff and faculty putting together DH programming often have to work hard to reach out to students just like them. They’re living it! It’s just a matter of reframing their own experiences as expertise. What has worked for them in their own DH education? What has not? What lessons could they take elsewhere? They often know more than they might think!

I could offer much more in the way of specific advice that comes up repeatedly for students interviewing for DH jobs: contextualizing themselves as a PhD graduate applying for library work, saying enough for a particular question, saying too much, recognizing those questions that feel like traps, etc. But really I would just trust yourself and your students. In the same way that your students are capable of shining but might need the help to see it, I am confident that someone who has read this far in a post on this topic will have good instincts about what to share with a student about their interview performance.

Share all notes, guides, and questions (including those you didn’t ask) after the fact with the students for their own prep work. Follow up with the student close to the date and afterwards, both to encourage them and to find out how to better mirror the mock format to what they saw in reality.

Last Caveats

Some advice for readers of this post: know your own limits. I only have participated in so many kinds of search committees. Those I have served on primarily pertained to digital humanities, alt-ac, or library jobs. Other institutional contexts and types of positions will look different, in ways I cannot know. When I get a request for something more out of my wheelhouse—like a faculty position or an industry gig—I will try to pull in folks with experience in those contexts. Your university might also have a career center that could offer some advice on certain kinds of positions. Graduate students might not be their usual clientele, though, so they might need some orientation to the kinds of positions as well. I am always transparent with students about the limitations of my own experience and where they might need to look for advice from others.

Even with this final warning to recognize the limitations of your experiences and resources, I would encourage you to think expansively about how you can gather what you do have into useful professional development experiences for students. Students need all the help they can get as they try to apply for a broad range of opportunities in a toxic and unsettled job market. Your students will benefit from the effort you put into helping them prepare, especially for alt-ac or digital humanities positions that might feel a bit unusual for those less familiar with them.
  •  

Making your command line a tiny bit better

There are tons of resources for customizing how your command line looks and works, including:

What follows are some small changes I made to my command line today, that I thought might be useful to others. These work if you, like me, are using a Mac, and Applications > Utilities > Terminal app as your command line tool.

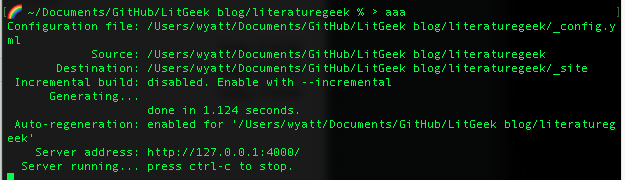
Screenshot of the author's command line app, showing the prompt now contains a rainbow emoji

Colors & tidiness

terminal > settings > profiles

Choose one of the color themes on the left sidebar. Then, to the right, use the “cursor” options to set your preference (bottom of “text” tab; I use a blinking block as most easily visible).

Under the “window” tab, deselect “restore text when reopening windows” so quitting and restarting gives me a clean screen. Use “title” if you want to put something fun at the top of your terminal window (I use “maple commands” to remind me of my pup Maple).

Add emojis

.zshrc

This part only works if your shell is .zsh, which is default on newer Macs. To check, enter echo $0 on the command line; it should print “-zsh” if you’re using .zsh.

Two options for working with this file!

Option A: enter nano /Users/wyatt/.zshrc in the command line, except change out “wyatt” to say your username instead.

Option B: Open a Finder window and hit command-shift-period. This toggles hidden files so they’re visible.

Navigate to [your computer]> Users > [your username] > .zshrc (it will appear in light gray text, possibly sorted to the bottom of the file folder). Open the .zshrc file in a text editor.

Paste the following text into the file, and save. If Terminal is already open, quit and reopen to see the changes.

# Customize prompt
PS1=$'\n''🌈 %~ %# > '

# alias to print the whole jekyll serve-watch command
alias aaa="bundle exec jekyll serve --watch"

The “PS1” line customizes the “prompt” (i.e. stuff at the start of the line where you enter commands).

$'\n' tells it to always leave a blank line on top, which visually helps me when I’m scrolling back through the window to figure out why I’m getting an error message, for example.

'🌈 %~ %# > ' starts the prompt with the rainbow emoji (you can paste in any other emoji you’d like!), followed by the file path you’re currently inside, followed by a > symbol and space (to visually help you see where the prompt ends and your past input commands start).

The “alias aaa” prompt sets things so that instead of needing to type out the command I use most often, I just type “aaa” instead. (bundle exec jekyll serve --watch builds and serves Jekyll sites locally, so that you can add/edit them and preview changes before pushing those to the Web.)

  •  

Scraping a webpage’s list of linked files using wget

I want to apply some text analysis tools to explore questions around a set of podcast interviews. There’s a webpage that lists links to transcripts of these interviews, one link per podcast episode text file. Because there are many episodes (over a 100?), I don’t want to manually click each link to download the episode’s transcript file.

Instead, I followed a Programming Historian lesson by Ian Milligan about the command-line utility wget. The lesson helped me understand how to customize wget’s options so it downloads each transcript file for me into a convenient folder, without overloading the website’s servers.

Here’s the command I used (after installing a couple things that Milligan’s lesson walks you through):

wget -r -l 3 ––random-wait -w 10 --limit-rate=20k [URL of folder containing desired files to download]

That command consists of the tool name (wget), a bunch of options modifying how the tool downloads files, and the URL you want to be downloading from. The options I chose to fit my particular webpage of interest:

-r says to follow links on the URL I provide to other links

-l 3 says to follow each link to 3 pages away from the initial URL I provided

-w 20 adds a 20 second wait between server requests

––random-wait was in response to my initial wget attempts producing a “ERROR 429: Too Many Requests.” message and not downloading files; it varies the wait time by 0.5 to 1.5 times the length provided with the -w 10 option above

--limit-rate=20k sets the maximum download speed to 20kb/s to be nice to the site’s bandwidth (initially tried -w 2; that allowed downloading of ~30 files then ran into 429 error again)

The files are now downloading in the background! My next step will be using another command-line utility, pandoc, to convert the transcript files from one file type (MS Word) to another file type friendlier to text analysis.

If you’re interested in automating downloads rather than manually clicking-saving a bunch, you might check out my post from 5(!) years ago on automating taking screenshots of webpages using a list of URLs (which I used to get a folder of screenshots of all my faved tweets).

If you’re interested but have never used the command line, Programming Historian has a peer-reviewed, free online tutorial aimed at humanities/cultural heritage folks who want to learn command line use. I highly recommend PH’s website; not only is every lesson created with communal care (author[s], editor, multiple reviewers), the lessons are aimed at humanities-ish folks (the things that might interest you, the things you might be excited to learn how to do with code), and the lessons are written in a very novice-friendly style (no assumptions you already know things; or the advanced lessons point you to the earlier lessons you’ll need to complete before you can comfortably follow them).

  •